What to Do if You Lose Your Car Keys

What to Do if You Lose Your Car Keys

Nationwide | December 10, 2021| Car Keys | Auto Insurance | Start a quote today!

It’s something you never want to think about but losing your car keys can happen to just about anybody. No matter how careful you are, all it takes is one second of forgetfulness to send yourself into a spiral of panic and anxiety.

If you’ve never lost your car keys before, you might be surprised to find out that car keys are the third-most misplaced item1.

Sometimes, you’re running a quick errand and jump out of your car only to have forgotten them on the seat. Other times, you’re coming home after a long day at work and throw your keys down somewhere you can’t remember the next day. No one wants to experience any of these instances, but they do happen. And it’s important to be prepared.

So, what do you do when you find yourself in a situation where you’ve lost your keys?

Retrace Your Steps

The first step in finding lost keys is retracing your steps. This sounds easy enough, but when you’re in panic mode, it can seem daunting.

When retracing your steps, it’s important to remember the last time you remember seeing your keys. Where you were? What you were doing? What did you do next? This can help you find your starting point.

Maybe you drove home and left them in your car or maybe you left them on the table at the restaurant you were just visiting. Retracing your steps is essential for giving you somewhere to start before resorting to any unfavorable calls.

If you truly have lost your keys, however, it’s time to call in an automotive locksmith. These specialists can help you get back on the road in no time. You’ll need to have some key information, however – so let’s find out what you need to make this process as seamless as possible.

Understand the Different Types of Car Keys

Knowing and understanding the differences in types of car keys is important for ensuring the process of finding or replacing them runs smoothly and seamlessly. You’ll need to inform your locksmith so they can get in with ease, but even before you make the call, you’ll need to know which locksmith will be able to help you based on the type of key you’ve lost.

Traditional car keys

A traditional car key is – you guessed it – traditional. These keys look and feel like classic keys, and work by being inserted into an ignition cylinder and turned to start the vehicle.

Transponder key

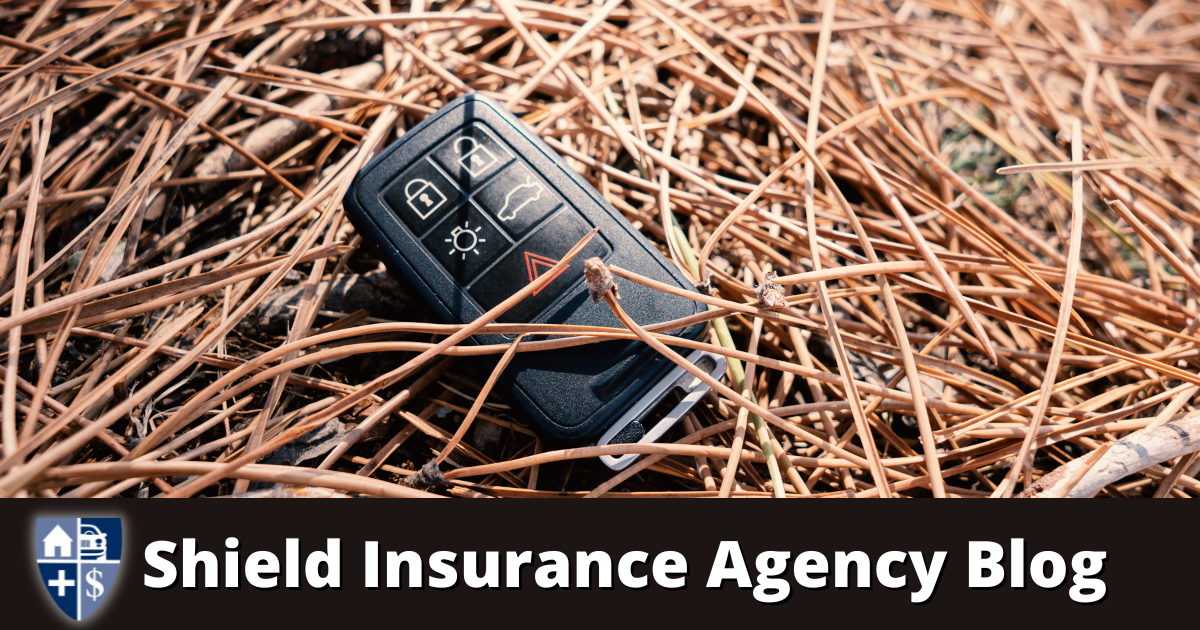
A transponder key is similar to a traditional key, but the difference is the head. At the top of the key is an electrical element that often contains buttons to lock and unlock your car, as well as open the trunk and set off an alarm.

This electrical element also contains a chip that’s necessary to start the vehicle.

Key fob with switchblade key

These types of keys include remote fobs that can lock and unlock the vehicle, with a spring-loaded key mechanism that folds into the fob like a switchblade. This dual system allows for remote access to the vehicle and a sleeker, minimal key design that folds into itself for easier transport.

Smart car keys

Smart keys are often called ‘keyless ignition’ keys. They’re used in place of actual keys. When used, drivers can unlock their cars remotely and use a push-start button system to start the car, not needing to insert a key into the ignition to get the engine running.

Can a Locksmith Make a Car Key Without the Original?

An experienced locksmith should be able to make you a car key without the original as long as it’s a traditional key. If your vehicle utilizes fobs, transponders, and smart keys, you’ll have to contact the dealership to get a new device created.

How Much Does it Cost to Replace a Car Key?

There is no standard price for a replacement car key, especially considering the many different types of car keys available today.

For traditional keys and fobs, the price is relatively low compared to the more complex keys – ranging from $50 to $1002. Fobs, however, can be programmed yourself or at the dealership which can cut down on these costs.

Transponder keys can cost around $200 to replace, but costs depend on whether you’re going through a locksmith or a dealer.

Switchblade keys are even pricier, averaging closer to $3003 to replace.

Smart keys require going to the dealer for a replacement as they will need to program the device and the vehicle. This can cost between $200 and $500 depending on location, dealership, and vehicle.

Contact a Locksmith Near You

Now that you’re equipped with all the information you need, you can contact a local locksmith. Knowing you’ve exhausted your search, understood what type of key you have, and feel confident and the price and capability of the job, you should have little problem finding the locksmith that’s right for you.

How to Prevent Losing Your Keys

Get a key tracker

Key trackers are a modern, new way to keep track of your keys, wallet, and more. These devices work via an invisible signal that’s transmitted across devices and often connects to an application on your phone.

Popular key trackers include Tile4, Apple AirTag5, Chipolo6 and Cube7 .

Create a designated spot for your car keys

Creating a hanging key holder by the door or a key bowl on a nearby table can be a quick and easy way to make sure you never lose your keys. It can quickly become part of your routine, dropping or hanging your keys as soon as you walk into the door. And it will always be the first place you look when you head on your journey.

Invest in a lanyard or key holder

A lanyard or other transportable keyholder is another simple fix to help you keep track of your keys. A long lanyard, chain, or trinket on your keys can make it harder to lose because of the noise it makes, the length of the attachment, and more. Adding bulk and weight to your keychain will also make it harder to lose when you’re out as you’ll be more likely to miss the feel of the keys in your purse or pocket.

Get a spare key

Another great way to ensure a lost key doesn’t slow you down is by creating a duplicate or requesting a spare. Accidents happen, after all, and things sometimes just disappear. With a spare key, you can be sure that you don’t lose valuable time, money, and energy by retracing your steps and contacting a locksmith.

On the Road and Lost Your Car Keys? Contact Roadside Assistance

In a new place and don’t know how to get to where you need to go? Nationwide offers 24/7 roadside assistance to get you back on the road with ease. To request assistance, just call 1-800-421-3535 or connect through the Nationwide Mobile app.

If you’re not already part of the Nationwide insurance community, you can get started quickly and easily. Contact Nationwide for an auto insurance quote to get started.

1https://www.prnewswire.com/news-releases/lost-and-found-the-average-american-spends-25-days-each-year-looking-for-lost-items-collectively-costing-us-households-27-billion-annually-in-replacement-costs-300449305.html

2https://www.edmunds.com/car-maintenance/the-high-cost-of-losing-your-keys.html

3https://www.carfax.com/blog/lost-car-key-fob-replacement

4https://www.thetileapp.com/en-us/

5https://www.apple.com/airtag/

6https://chipolo.net/en-us/

7https://cubetracker.com/

Disclaimer:
The information included is designed for informational purposes only. It is not legal, tax, financial or any other sort of advice, nor is it a substitute for such advice. The information may not apply to your specific situation. We have tried to make sure the information is accurate, but it could be outdated or even inaccurate in parts. It is the reader’s responsibility to comply with any applicable local, state, or federal regulations. Nationwide Mutual Insurance Company, its affiliates, and their employees make no warranties about the information nor guarantee of results, and they assume no liability in connection with the information provided. Nationwide, Nationwide is on your side, and the Nationwide N and Eagle are service marks of Nationwide Mutual Insurance Company. © 2021 Nationwide and Shield Insurance Agency.


More great blogs by Shield Insurance Agency

Read More
How to Paint an Aluminum Boat

How to Paint an Aluminum Boat

Nationwide | December 07, 2022 | Aluminum Boat | Boat Insurance | Start A Quote Today!

Aluminum fishing boats and pontoon boats provide an affordable, fun way to explore the water. Records show 85,431 aluminum boats were registered in 2021 alone. [1]

Proper maintenance is key to making sure you can get ample enjoyment and use from it for years to come. To keep your aluminum boat in top condition, follow these tips for cleaning, polishing, and painting.

Clean and prepare your boat

Prior to polishing and painting your boat, make sure the surface is clean. Follow these steps to clean your aluminum boat:

1. Dry dock your aluminum boat

Pull your boat out of the water and prep a work area. This can be in a garage or a larger space that can get wet, such as a driveway or a dry-docking space at your local marina.

Elevate the boat off the ground in this workable space. If you need to use a sander or buffer, dry-dock your boat in an area where you have access to electricity.

2. Sand off loose paint and rust

If the boat has any rust, sand it off so you have a smooth surface. Depending on the sizes of the rusty patches, you might need a power sander and varying grit levels of sandpaper.

3. Wash the aluminum boat

You’ll want to clean all the grime and dust off. If you’ve waxed your boat previously, use a dewaxing solvent to remove traces of old wax. [2]

Mix mild soap and water in a spray bottle. Spray the boat and wipe it down with a sponge. This removes dirt but not hard stains. To remove tougher stains, mix a solution of 50% distilled vinegar and 50% warm water. Spray that mixture on the boat, let it sit for 60 seconds, and wipe it away.

Mild soap and vinegar are simple DIY solutions, but there are special cleaning products available too. Sometimes a stronger cleaner is necessary to remove oxidation. There are specific cleaners that can handle these dark patches, but they’re abrasive. Carefully follow the instructions on these products to keep yourself safe.

4. Rinse the boat

Grab a hose and rinse the cleaner from the boat. Be sure to use fresh water; you don’t want to use seawater or lake water. If you have the time, polish your boat once it’s dry.

Polish your boat

Follow these steps to polish your aluminum boat: [3]

1. Use aluminum boat polish

There are dozens of polishes on the market, but you need an aluminum-grade polish. You can also use an aluminum cleaner that can clean, polish, and protect your boat as an all-in-one option.

2. Apply the polish

To start, rub or paint the polish on the boat. You can do this by hand or with a power buffer. Polishing by hand can be rewarding, but it’s labor-intensive and can be more time-consuming. A power buffer can get the job done efficiently and quickly. However, you still might need to hand-buff nooks and crannies.

3. Work in small sections

Apply polish to small sections of the boat, working to completely cover each area before moving on to the next. Results should be instant as you work the polishing compound into the boat’s surface.

4. Check the boat

After applying the polish all over the boat, take a walk around it to make sure you haven’t missed any spots.

5. Let the polish dry

Let the polish dry completely, which usually takes 5 to 20 minutes. Be sure to check the instructions for your polish for the exact drying time. Wipe the boat down with a clean, dry cloth. [4]

Paint your aluminum boat

After your boat’s surface has been cleaned and polished it is ready to be painted. Plan for this project to take a few days. Follow these steps to paint an aluminum boat: [5]

1. Find a location for painting

Try to start this project when the weather forecast says there will be a few days of rain-free weather. Pick a work area that’s outside. It’s important that the work area is away from cars and buildings. Put a piece of plastic down to catch dripping paint. Elevate the boat so you have access to all areas of the hull.

2. Prepare the surface for paint

Before painting, remove rust, dirt, chipping paint, old wax and polish. Depending on the amount of rust present, you may need a power sander to create a smooth surface. Once you’ve removed rust, clean the boat by following the cleaning steps above.

3. Apply primer

Apply a self-etching, oil-based primer that sticks to aluminum surfaces. [6] Using a brush or a sprayer, apply a thin layer of primer inside the boat. Let it dry and then paint the outside. Let the primer dry overnight, or for at least 12 hours, before moving on to the painting process.

4. Apply aluminum boat paint

Choose a water-resistant marine paint that adheres to aluminum. Using a sprayer or brush, paint the inside of the boat first. Paint in horizontal strokes for an even coat. The inside coat should dry for around 12 hours before you paint the exterior. The outside coat needs to dry for the same amount of time. You may decide to add a second layer of paint to the boat for protection. If so, make sure the paint dries completely between applications.

5. Apply a clear coat

Once the painting is finished, apply a clear protective coat. This layer helps keep the paint intact and prevents scratches. Check the product label to determine how long this coat will need to cure before you put the boat in the water again.

A fresh layer of paint will help protect the exterior of your boat, but this is not the only way to protect it. Another component of caring for your boat is having boat insurance. Find out whether you need boat insurance before you put your boat in the water.

Frequently asked questions

Can you paint over old paint on an aluminum boat?

Painting over old paint on an aluminum boat is not advised; however, there are a few key things to consider if you do attempt it.

  1. What type of paint was the old paint? Will the new paint adhere or react to it?
  2. Is the old paint flaking or peeling? If so, the new paint won’t have a good surface to stick to.
  3. Are you planning on sanding the old paint surface or chemically preparing it for a fresh coat of paint?

If you know the paint types and there are no conflicts, it’s recommended that you sand the hull prior to painting so that the loose paint will flake off. [7]

Should you paint the bottom of an aluminum boat?

While many might think painting the bottom of your boat unnecessary, it’s actually an essential part of protecting your aluminum row boat from the elements. When choosing your bottom paint, make sure to pick one that is specifically designed for aluminum boats, as some bottom paints can cause corrosion on aluminum. In general, you’ll want to apply two coats for the best results. [8]

How to clean a painted aluminum boat

Maintaining your boat’s condition is important to keep it clean, especially for an aluminum boat, which can be easily damaged by dirt and algae. Follow the steps below to clean your painted aluminum boat:

  1. Remove the boat cover, motor, and any other large items
  2. Hose down the entire boat
  3. Scrub the hull with a smooth brush that won’t damage the paint
  4. Rinse the hull with clean water at a low pressure
  5. Dry the hull with a cloth
  6. Inspect the hull for any remaining dirt or debris
  7. Let the boat dry completely
  8. Wax the boat

Cleaning a painted aluminum boat isn’t difficult, but it does require special care. Avoid using harsh chemicals, and be sure to use the proper detergents and brushes. Waxing the boat will help create a barrier that will protect the paint from scratches and rust. [9]

Protect your boat

You have made this investment in your aluminum boat and carefully painted and cleaned it; now you need to protect it. Why? Boat insurance can be the difference between navigating a crisis peacefully and needing to pay tens of thousands of dollars if things go wrong. It could also protect against third-party liability for damage caused by you and your boat, which may be the bare minimum protection required to moor in your marina. Ultimately, boat insurance will give you peace of mind knowing you’re protected while you’re out on the water, no matter what occurs. [10]

Sources

[1] “The Glass is Still Half Full,” tradeonlytoday.com/columns-blogs/the-glass-is-still-half-full (July 18, 2022).

[2] “Polishing an Aluminum Boat [Guide],” boatlife.com/boatlife-blog/polishing-an-aluminum-boat-guide (accessed Aug. 4, 2022).

[3] “Cleaning an Aluminum Boat with Vinegar,” pontoonopedia.com/cleaning-aluminum-boat-vinegar (June 11, 2018). x

[4] “6 Steps to Painting Aluminum Boats,” chiyachtrefinishing.com/blogs/6-steps-to-painting-aluminum-boats (June 20, 2018).

[5] “How to Paint an Aluminum Jon Boat,” bottompaintstore.com/blog/aluminum-application/paint-jon-boat (accessed Aug. 4, 2022).

[6] “How to Paint a Boat,” boats.com/how-to/how-to-paint-a-boat (April 14, 2021).

[7] “How To Paint Over Your Aluminum Boat (Step-by-Step),” watercraft101.com/how-to-paint-aluminum-boat (accessed Aug. 4, 2022).

[8] “How to Apply Bottom Paint to an Aluminum Boat,” bottompaintstore.com/blog/aluminum-application/how-to-apply-bottom-paint-to-an-aluminum-boat (accessed Aug. 4, 2022).

[9] “How To Clean Painted Aluminum Boat? Complete Guide,” emozzy.com/how-to-clean-painted-aluminum-boat (April 9, 2022).

[10] “Why Boat Insurance Is Important & How To Obtain It,” wavetechpowersports.com/why-boat-insurance-is-important-how-to-obtain-it (accessed Aug. 4, 2022).

Disclaimer:

The information included here is designed for informational purposes only. It is not legal, tax, financial or any other sort of advice, nor is it a substitute for such advice. The information may not apply to your specific situation. We have tried to make sure the information is accurate, but it could be outdated or even inaccurate in parts. It is the reader’s responsibility to comply with any applicable local, state or federal regulations. Nationwide Mutual Insurance Company, its affiliates, and their employees make no warranties about the information nor guarantee of results, and they assume no liability in connection with the information provided. Nationwide and the Nationwide N and Eagle are service marks of Nationwide Mutual Insurance Company. © 2022 Nationwide and Shield Insurance Agency.

Read More
How to Move Your Pets into a New Home

How to Move Your Pets into a New Home

Nationwide | February 22, 2023 | Pets | Pet Insurance | Start A Quote Today!

Moving is stressful in itself, but it can get overwhelming if you factor in planning for your pets to make the big transition. However, you can take several steps to ensure the move goes as smoothly as possible for you and your pet. A well-laid-out plan will help you worry less during the stress of packing and relocating your household, making a move a happier and easier transition for everyone.

Why moving is stressful for pets

From a pet’s point of view, their current home is more than just their home – it’s their territory. When everything familiar to your pet gets packed up and hauled away, they can often experience significant distress. No matter how much your move will improve your pet’s life, they can’t understand why everything is being upended. For this reason, pet owners need to be sensitive to the needs of their pets during moves. [1]

Tips for moving with pets

Check out the tips below for a safer and simpler move with your animal pal.

1. Ensure that your new home or a new city is pet-friendly.

It’s a good idea to walk the neighborhood of your new home to determine whether the area is safe for your pets. Also, consider the amount of square footage your pet needs. Cats typically need more vertical space and less outside space than dogs, while dogs need space to run around and go to the bathroom outside. [2]

2. Chat with your vet.

Your veterinarian is an excellent resource for questions about reducing your pet’s anxiety levels during the move. If you’re moving out of state, it’s a good idea to visit your vet a few weeks before leaving so you can get vet recommendations, copies of your pet’s medical files, and ensure your pet is up to date on all vaccines and medication. [3]

3. Familiarize your pets with packing supplies and boxes.

Most pets aren’t big fans of change. To help ease the anxiety of moving, bring in moving boxes early and keep your animal pals in a familiar room that you plan to pack up last. [2]

4. Maintain a routine leading up to the move.

Pets are creatures of habit. To keep your pet’s stress levels down in the weeks leading up to moving, stick to the same feeding schedule, stick to regular walks or playtimes, and give them a little extra love. [3]

5. On a moving day, keep your pets in a secure and secluded space.

During the move, doors will be left open, and people will be going in and out. To keep your pet secure, place them in a kennel in a quiet part of the house or a separate closed room so they don’t run away due to fear and confusion. [3]

6. Introduce your pet to the crate.

If your pet doesn’t have much experience with a crate or carrier, get them comfortable with it before the move. First, place their food in the open crate and then shut the crate’s door during mealtime. Anything you can do to help your pet foster a positive association with the crate will save stress for both of you on a moving day. [1]

7. Pack a pet travel bag.

Reduce stress further by having all your pet’s necessities packed and easily accessible. This includes water bowls, favorite toys, a blanket, food, treats, kitty litter, and more. Don’t forget a roll of paper towels and disposable plastic bags to help with unexpected cleanups. [3]

8. Pet-proof your new home.

It’s a good idea to pet-proof your new home before introducing your pet to the house. Make sure to tuck away electrical cords, plug up nooks and close off crawl spaces where your pet could get stuck, ensure that all windows have secure screens, and secure or remove any poisonous houseplants. [2]

9. Gradually introduce your pet to the new home.

When you finally arrive at your new home, allow your pet to adjust to one new room, including their favorite toys, treats, water, and food bowls. When they seem comfortable, introduce them to other rooms in the house while keeping some doors shut. With patience, your pet will feel at home in no time. [2]

Once you arrive at your new home safely with your beloved pet, ensure you are protected with pet and home insurance.

Sources:

[1] “Guide to Moving with Household Pets: Safely Relocating your Furry, Feathered, and Scaly Friends,” Joe Robison, movebuddha.com/blog/moving-with-pets (Feb. 16, 2022).

[2] “Moving with your Pet,” aspca.org/pet-care/general-pet-care/moving-your-pet (accessed Jan. 12, 2023).

[3] “11 Tips For Moving With Pets: The Ultimate Guide,” einsteinmoving.com/moving-with-pets-tips-tricks (accessed Jan. 12, 2023).

Disclaimer:

The information included here is designed for informational purposes only. It is not legal, tax, financial or any other sort of advice, nor is it a substitute for such advice. The information may not apply to your specific situation. We have tried to make sure the information is accurate, but it could be outdated or even inaccurate in parts. It is the reader’s responsibility to comply with any applicable local, state, or federal regulations. Nationwide Mutual Insurance Company, its affiliates, and their employees make no warranties about the information nor guarantee of results, and they assume no liability in connection with the information provided. Nationwide and Shield Insurance Agency


More great blogs by Shield Insurance Agency

Read More
Driving at Night: How to Stay Safe

Driving at Night: How to Stay Safe

Nationwide | March 08, 2023 | Driving at Night | Auto Insurance | Start a Quote Today!

While we typically drive a quarter of the time at night, studies show that 50% of traffic deaths happen at night. [1] It doesn’t matter whether you know the road you’re driving on or not; it is always more dangerous to drive at night. With a few extra precautions, you can reduce the risk of something dangerous happening while driving at night.

Why is driving at night more dangerous?

There are several reasons why driving at night is significantly more dangerous than during the day.

  1. Compromised night vision: This is especially prevalent in drivers over 60.
  2. Fatigue: 1 in 25 adult drivers report falling asleep in the last 30 days, and many more admit to driving while sleep-deprived. [2]
  3. Rush hour: Roads get more crowded and dangerous between 4 and 7 p.m. due to drivers eager to get home after work.
  4. Impaired drivers: Drivers impaired by drugs and alcohol are more frequently on the road after dark.

Tips for driving at night in the dark

1. Be a defensive driver.

Defensive driving is utilizing safe driving strategies to address identified hazards predictably. When you drive defensively, this reduces your driving risk by anticipating situations and making well-informed decisions. [3]

2. Clean your windshield before driving at night.

Built-up grime on your windshield can increase the glare from other cars and streetlights, making it harder for you to see the road. Damaged windshields can have a similar effect, so fix any cracks before driving. [4]

3. Don’t drive while drowsy when driving at night

It’s always important to ensure you’re well-rested and alert when you’re behind the wheel. But your brain makes more sleep-inducing melatonin when it’s dark, meaning you’re more likely to get tired while driving at night. If you experience eye drooping or extreme fatigue, find a place to stop and rest for the night. [4]

4. Check your headlights.

Keeping headlights clean and lit is the key to safe night driving. If just one headlight is illuminated, it not only cuts down on your visibility but can also get you a citation from law enforcement. Double-check before driving that both headlights are on and working. [5]

5. Slow down.

It’s never a good idea to drive too fast and follow the driver in front of you too closely. This could cause an accident if they stop too suddenly. Also, the closer your headlights are, the brighter they can seem and the more distracting they can be. [5]

6. Watch out for pedestrians.

Always take extra time to watch for pedestrians on poorly lit roads. People don’t always wear safety gear, which can be incredibly difficult to see after dark. Also, make sure you’re not driving distracted, whether texting, adjusting the radio, or eating in your car. Taking your full attention off the road is a bad idea. [6]

7. Keep up with your yearly vision tests.

Stay current on eye exams to ensure your vision is at its best, especially while driving at night. If you wear glasses, ensure they are anti-reflective to reduce glare and increase visibility. [7]

8. Watch out for wildlife.

Make sure to be extra cautious, slow down, and keep an eye out for any big animals. Hitting a deer or an elk is hazardous to drivers and passengers, often resulting in thousands of dollars in vehicle damage. [8]

One of the best ways to protect yourself and your vehicle from any harm from driving at night is to ensure you have the right auto insurance.

Sources:

[1] “The Most Dangerous Time to Drive,” nsc.org/road/safety-topics/driving-at-night? (accessed Jan. 6, 2023).

[2] “Drivers are Falling Asleep Behind the Wheel,” nsc.org/road/safety-topics/fatigued-driver (accessed Jan. 6, 2023).

[3] “What is Defensive Driving?” safemotorist.com/articles/defensive-driving (accessed Jan. 6, 2023).

[4] “10 Night Driving Safety Tips You Should Know for Future Road Trips,” self.com/story/night-driving-safety-tips (Dec. 14, 2020).

[5] “Enjoy the Stars: 5 Critical Tips for Safe Night Driving,” driving-tests.org/beginner-drivers/top-5-tips-for-safe-night-driving (accessed Jan. 6, 2023).

[6] “Night Driving Tips: What You Need to Know,” idrivesafely.com/defensive-driving/trending/night-driving-tips-what-you-need-know (accessed Jan. 6, 2023).

[7] “Safety Tips for Night Driving,” verywellhealth.com/night-driving (July 12, 2022).

[8] “Watch for wildlife on highways and avoid costly collisions,” Connor Liess, cdapress.com/news/2022/nov/24/watch-wildlife-highways-and-avoid-costly-collision (Nov. 4, 2022).

Disclaimer:

The information included here is designed for informational purposes only. It is not legal, tax, financial or any other sort of advice, nor is it a substitute for such advice. The information may not apply to your specific situation. We have tried to make sure the information is accurate, but it could be outdated or even inaccurate in parts. It is the reader’s responsibility to comply with any applicable local, state or federal regulations. Nationwide Mutual Insurance Company, its affiliates and their employees make no warranties about the information nor guarantee of results, and they assume no liability in connection with the information provided. Nationwide and the Nationwide N and Eagle are service marks of Nationwide Mutual Insurance Company. © 2023 Nationwide and Shield Insurance


More exciting articles featured by Shield InsuranceAagency

Read More
What Is Power Steering Fluid?

What Is Power Steering Fluid?

Nationwide | February 22, 2023 | Power Steering | Auto Insurance | Start a quote today!

Like all fluids in your vehicle, power steering fluid plays an important and specific role in keeping your car operating at peak performance. This fluid is critical for providing the steering system with hydraulic assistance so you can turn your vehicle’s steering wheel easily. It also helps lubricate the power steering pump and the steering components. Power steering fluid even prevents corrosion. Because this fluid serves various purposes, you can see why it’s important to use the right kind. [1]

Where is the power steering fluid located?

When you’re looking for the power steering fluid under the hood, check the passenger side of the vehicle, and you should be able to spot the reservoir. The power steering fluid is usually in a white or yellow container with a black cap labeled “power steering” or “steering fluid.” [1]

How to check power steering fluid

If you hear a whining sound coming from your hood when you turn or if it’s becoming more difficult to turn, your car might be running low on power steering fluid.

Before checking your car’s power steering fluid, warm the engine to a normal operating temperature by turning the steering wheel in one direction until it stops. Next, turn the wheel all the way in the opposite direction. Repeat this process several times, then follow the steps below:

  1. Turn off the engine.
  2. Wipe the power steering reservoir and cap clean with a cloth.
  3. Check the dipstick attached to the reservoir to see the fluid level, then wipe it clean.
  4. If the fluid level is below the MIN line, add new fluid, careful not to exceed the MAX line.
  5. Examine the quality of fluid in the reservoir. [2]

What color is the fluid?

Most power steering fluid is red, amber, pink, or clear. If the fluid is lighter, it doesn’t contain any debris and is okay to use. It likely needs to be changed if it’s dark brown or foamy. [1]

What does power steering fluid do?

Power steering fluid is a hydraulic fluid used in the steering system to decrease the effort required to turn the wheels. It also lubricates the moving parts within the steering system and prevents corrosion in the power steering gear to keep the vehicle working optimally. [1]

How often do I need to replace the power steering fluid?

On average, your car needs a power steering fluid flush every 40,000 to 80,000 miles. Your recommended flush routine depends on your vehicle because the steering system and fluid needs vary by car. Check your owner’s manual for specific manufacturer recommendations. [3]

Can you drive without it?

When you drive without power steering fluid, you need to exert more force when turning the wheel, and the steering is much heavier. If you wait a long time before filling your car with power steering fluid, damage to the steering pump becomes inevitable. When the pump vanes lack lubrication, the risk of damaging the drive belt increases. The shaft and rack seal can also break down without power steering fluid. [4]

Cons of driving without fluid:

  • Noisy steering
  • Jerky or jumpy power steering
  • Difficulty turning the steering wheel
  • Stains or puddles under the vehicle
  • Locked steering wheel [5]

Types of power steering fluid

  • Automatic transmission fluid (ATF): The same fluid used for automatic transmissions can be used in some power steering systems.
  • Synthetic power steering fluid: A fluid usually engineered for specific types of cars or steering systems. Most newer vehicles use synthetic fluid created in a lab.
  • Nonsynthetic mineral power steering fluid: Mineral hydraulic fluid may be used in some instances that accept ATF. [2]

Which power steering fluid is right for your car?

No single rule applies when it comes to power steering fluids for cars. Instead, take time to review your owner’s manual, do some online research, or check with your dealership’s service department to ensure that the fluids you’re using are right for your car.

Power steering fluid substitutes

Can you use brake fluid for power steering fluid?

Using brake fluid in the power steering system will damage your car. Both fluids may have been similar in the past, but now they are very different and should only go in their designated systems. [6]

Can you use transmission fluid for power steering fluid?

It gets a little trickier when deciding if you can use automatic transmission fluid instead of power steering fluid. You want to ensure you’ve done your homework on this one before you consider swapping out fluids. While some systems were designed to use automatic transmission fluid, others require that you use only steering wheel fluid.

Before doing car maintenance on your own, check your owner’s manual to see what the car manufacturer recommends. It should specifically state in the manual which fluid to use. Some models require specific fluid types, such as synthetics, so it’s worth taking the time to track down the correct information. If you can’t find your owner’s manual, contact a car mechanic or car dealership and talk to the service department. [7]

Using the wrong type of fluid can cause damage to some seals, plastic, and rubber components inside your vehicle. And, if it doesn’t mix well with the fluid you’re adding it to, it could create an acidic reaction. [8]

Adding power steering fluid isn’t the only important maintenance task to perform on your car. Use this maintenance checklist to keep up with the various time-sensitive checks and changes your vehicle needs to run at its best.

Sources:

[1] “What Is Power Steering Fluid? Everything You Need to Know,” uti.edu/blog/automotive/power-steering-fluid (Mar. 29, 2021).

[2] “Power Steering Guide: Everything You Need to Know,” Chris Hardesty. kbb.com/car-advice/power-steering-guide (Oct. 12, 2021).

[3] “Do I Need a Power Steering Fluid Change?” chapelhilltire.com/do-i-need-a-power-steering-fluid-change (accessed Dec. 22, 2022).

[4] “Is it safe to drive a vehicle without power steering fluid?” cfmautopro.ca/blog/is-it-safe-to-drive-a-vehicle-without-power-steering-fluid (Jan. 7, 2021).

[5] “What Happens If You Drive The Car With Low Power Steering Fluid?” Tsukasa Azuma. carfromjapan.com/article/car-maintenance/what-happens-if-you-drive-the-car-with-no-power-steering-fluid (May 17, 2021).

[6] “Can I Use Break Fluid in Power Steering? What Will Happen?” drivinglife.net/brake-fluid-in-power-steering (July 2019).

[7] “How Much Does a Power Steering Flush Cost?,” gobdp.com/blog/power-steering-fluid-car/ (accessed Dec. 22, 2022).

[8] “Power Steering Fluid Alternatives,” Richard Reed. thevehiclelab.com/power-steering-fluid-substitute/ (Aug. 31, 2021).

Disclaimer:

The information included here is designed for informational purposes only. It is not legal, tax, financial or any other sort of advice, nor is it a substitute for such advice. The information may not apply to your specific situation. We have tried to make sure the information is accurate, but it could be outdated or even inaccurate in parts. It is the reader’s responsibility to comply with any applicable local, state or federal regulations. Nationwide Mutual Insurance Company, its affiliates and their employees make no warranties about the information nor guarantee of results, and they assume no liability in connection with the information provided. Nationwide and the Nationwide N and Eagle are service marks of Nationwide Mutual Insurance Company. © 2022 Nationwide and Shield Insurance Agency


More fascinating articles featured by Shield Insurance Agency

Read More
Negotiate Pets with Your Landlord

How to Negotiate Pets

Nationwide | September 28, 2022 | Pets | Pet Insurance | Start A Quote Today!

If you’re worried about finding quality housing that will welcome your pet, you’re in good company. Navigating a tight rental market can be especially frustrating for pet owners. However, it is possible to negotiate your pet with your landlord whether you’ve found a home you would like to rent or are hoping to bring a furry friend into your current residence.

Acquire a landlord permission letter for pets

It’s important to get your landlord’s permission upfront. You can even come to your landlord prepared with a pet agreement to help start the conversation. You’ll want to make sure you have documentation of your landlord’s permission to have your pet on the property. [1]

The law allows for landlord discretion on pets.

Even if your landlord grants you approval to have a furry friend in your home, you still want to clearly read your lease agreement and make sure you understand the rules and restrictions around which pets are allowed on the property. The law allows for landlord discretion in determining whether or not tenants can own a pet as well as what breeds and sizes of animals are permitted. The law also grants landlords the right to impose fees related to pets. It’s important to make sure you’re carefully going over your landlord’s pet policy to make sure you understand any restrictions or limitations before signing your lease. [1]

Tips for negotiating pets with your landlord

Some landlords are weary of having pets on their property because of the potential noise and damage they can cause. This can be a barrier to finding housing that will allow pets, but there are several ways you can help improve your chances of finding a place for you and your furry friend to call home.

Be proactive in the housing search

Give yourself as much time as possible to find pet-friendly housing. If you don’t currently have a pet but are thinking of getting one in the future, you might want to find housing that will allow pets well before bringing one home. You can make your search easier by researching animal-friendly listings online. Ask your friends, family, and social media connections if they happen to know of any pet-friendly landlords or available properties. [2]

Come to the negotiations prepared

If you found a home you like but the landlord is not currently allowing pets, there are a few things you can come prepared with to help change their mind: [1] [2] [3]

  • Pet rent: You can offer pet rent. In most cases, landlords will require it anyway, but offering it helps to show good faith. It should be noted that pet rent is separate from your base rent and should not be incrementally increased as your base rent is increased.
  • Pets deposit: Additionally, you can suggest a pet deposit for any potential damages. Pet deposits are also separate from your standard deposit and cannot legally be withheld for any dispute unrelated to your pet.
  • Sample pet agreement: There are resources online that can help provide a sample pet agreement for you to share with your landlord. Coming prepared with one will help show you’re a thoughtful and knowledgeable tenant.
  • Pets resume with references: Show your landlord that your furry friend is well-behaved by sharing any training certifications your pet has. Even sharing photos of your pet playing with children can help show that your pet is friendly and won’t be a problem to your neighbors, and your veterinarian can also help by providing documentation of your pet’s vaccine records and a letter of reference.
  • Research building policies and local laws that might work in your favor: Sometimes the law is on your side when it comes to having a pet in your rental home. For example, in New York, if you get a pet and the building board doesn’t start a court proceeding against you within 3 months, you’re allowed to keep your pet. Research the laws in your state and find out whether there are any that could apply to your situation.
  • Reasonable accommodation: If you have an emotional, physical, or psychiatric disability, the law allows you to keep an assistive animal, and you’re legally protected from discrimination as a tenant. The law also requires landlords to make reasonable accommodations for you and your pet if your pet is an emotional support animal (ESA). The Rehabilitation Act of 1973 and The Fair Housing Amendments Act of 1988 both protect assistive pets in cases where landlords prohibit pets. In this instance, you may have to produce documentation that your pet is an assistive animal. This documentation can usually be provided by a health professional, such as a psychiatrist, psychologist, doctor or licensed therapist.

Common pet complaints and problems for renters

Even if your landlord grants approval for your pet, you might still deal with some challenges that could even result in eviction: [1]

  • Lease documentation specifies no pets: It’s important to read over your lease carefully and suggest any necessary changes before signing. If your lease stipulates that pets aren’t allowed on the property, make sure this is removed before signing and bringing a pet into the residence.
  • New ownership of property decides to not allow pets: If your place of residence is bought by new ownership that chooses not to allow pets, you may be asked to remove your pet or to leave the property.
  • Complaints from other tenants: This could cause your landlord to issue an eviction notice.

Pets are an important part of the family that help bring comfort and joy into our homes. Protect your pet like family with Nationwide’s Pet Insurance Policies.

Sources:

[1] “Negotiating for Pets: Tips for Success,” bhrentersalliance.org/2017/09/negotiating-for-pets/

[2] ”Information for renters with pets,” humanesociety.org/resources/information-renters-pets

[3] “How to Negotiate Pets with Skeptical Landlords,” emotionalpetsupport.com/2020/03/how-to-negotiate-pets-with-skeptical-landlords/

Disclaimer:

The information included is designed for informational purposes only. It is not legal, tax, financial or any other sort of advice, nor is it a substitute for such advice. The information may not apply to your specific situation. We have tried to make sure the information is accurate, but it could be outdated or even inaccurate in parts. It is the reader’s responsibility to comply with any applicable local, state or federal regulations. Nationwide Mutual Insurance Company, its affiliates and their employees make no warranties about the information nor guarantee of results, and they assume no liability in connection with the information provided. Nationwide and the Nationwide N and Eagle are service marks of Nationwide Mutual Insurance Company. © 2022 Nationwide and Shield Insurance Agency


Visit other articles featured by Shield Insurance

Read More
Living in a First Floor Apartment: Safety, Pros, and Cons

Living in a First-Floor Apartment: Safety, Pros, and Cons

Nationwide | December 09, 2022 | First-Floor Apartment | Renters Insurance | Start your quote today!

Living on the first floor can have its advantages—moving in and out is so much easier because you don’t have to worry about hauling furniture upstairs, it’s simpler to get in and out and carry groceries into your apartment, and you don’t have to worry about climbing stairs or using an elevator. However, living on the first floor can have its drawbacks too. Here’s everything you’ll want to consider when living in a first-floor apartment.

Benefits of living in a first-floor apartment

When your apartment is on the first floor, you likely have the benefit of lower living costs. That’s because units on the ground floor tend to be cheaper to rent and have lower cooling costs. Additionally, if you want an apartment that has a garden or patio, you’re more likely to be able to find those features in a first-floor apartment. Not to mention it’s also much more convenient to get in and out of the building, which can be especially nice if you have a pet, struggle with mobility, or don’t enjoy lugging groceries up flights of stairs. [1]

First-floor apartment disadvantages

While living on the first floor can come with lots of perks, it’s not for everyone. In a ground-floor apartment, you can have less privacy depending on where your apartment is located in the complex. You also may have issues with packages getting stolen if they’re delivered to your porch or if the door to your apartment is adjacent to the street. And while your cooling bills will be lower, you may face higher heating bills in the winter. You may also deal with more outside noise in addition to wanting additional security measures for your apartment if you are living on the first floor. [1]

First-floor apartment safety tips

When you live on the first floor, you’ll want to make sure you’re taking proper precautions to keep your apartment safe. However, a lot of these precautions are beneficial no matter what floor you live on. You can keep your apartment safe by making sure it has secure doors and locks, as well as adding an alarm system if your apartment doesn’t have one already. You can also improve your apartment’s safety by blocking the view into your apartment with curtains or blinds. This helps prevent criminals from peering into your apartment for items they may want to steal. Additionally, by keeping your apartment well-lighted inside and out, you give criminals fewer places to hide in the shadows. Installing security devices on doors and windows and keeping valuables in a hidden place away from windows and doors can also help discourage break-ins. [2] [3]

Tips for picking the perfect ground-floor apartment

If you’re looking for a first-floor apartment, there are several things you’ll want to keep in mind during your search. For starters, you’ll want to check to see if the building has added security for ground-floor units. You’ll also want to look for a unit that has large windows with lots of natural light because you might not get as much natural light in your apartment as you would on a higher floor. Furthermore, you will want to keep in mind that you may be subject to more noise on the first floor if the apartment is close to mailboxes, elevators, parking areas, and street or pedestrian traffic, but you may also offset this drawback by spending less on rent in a ground floor apartment since some first-floor units are discounted. [4]

Protect your apartment with renters insurance

No matter what floor your apartment is on, it’s always a good idea to have renters insurance. You can get a free quote today and start protecting your apartment with insurance from Shield Insurance.

Sources

[1] “Everything You Need to Know About Living in a First-Floor Apartment,” streeteasy.com/blog/living-in-a-first-floor-apartment-pros-and-cons (accessed June 30, 2022).

[2] “Pros and Cons of Living in a First-Floor Apartment,” realtor.com/advice/rent/first-floor-apartment-pros-and-cons (accessed June 30, 2022).

[3] “Securing Your Ground Floor Apartment,” brinkshome.com/smartcenter/securing-your-ground-floor-apartment (accessed June 30, 2022).

[4] “5 Simple Ways to Enhance First-Floor Apartment Safety and Security,” bobvila.com/articles/first-floor-apartment-safety (accessed June 30, 2022).

Disclaimer:

The information included here is designed for informational purposes only. It is not legal, tax, financial or any other sort of advice, nor is it a substitute for such advice. The information may not apply to your specific situation. We have tried to make sure the information is accurate, but it could be outdated or even inaccurate in parts. It is the reader’s responsibility to comply with any applicable local, state or federal regulations. Nationwide Mutual Insurance Company, its affiliates and their employees make no warranties about the information nor guarantee of results, and they assume no liability in connection with the information provided. Nationwide and the Nationwide N and Eagle are service marks of Nationwide Mutual Insurance Company. © 2022 Nationwide and Shield Insurance Agency


More great articles featured by Shield Insurance

Read More
First Time Home Buyers

11 First-Time Home buyer Tips

Nationwide Blog | March 14, 2023 | Home | Home Insurance | Start A Quote Today!

Few experiences are more exciting or rewarding than purchasing a home for the first time. However, the process can be more complex than it may seem. Working with a skilled agent can make things go more smoothly, but remaining involved at all phases is essential. Anticipating and addressing critical issues directly can make the buying experience easier and more enjoyable. It can also help ensure you come away with the best deal. Consider the advice for first-time homebuyers below:

1. Identify your needs in a home.

You have options when purchasing a residential property, including a single-family home, a duplex, a townhouse, a condominium, or a multifamily building with two to four units. Each option has pros and cons, so you must decide which property will help you reach your homeownership goals. [1]

2. Begin building your home savings in preparation

Browse first-time homebuyer programs in the city and state where you want to buy. Look at your weekly and monthly expenses to find ways to trim your spending. Rather than saving in an account that pays little to no interest, compare interest rates on options to park your money, such as CDs or high-yield savings accounts. [2]

3. Be prepared to commit to a home loan.

The most popular type of mortgage is the 30-year home loan, which gives homebuyers three full decades to pay it off, meaning smaller payments over a more extended period. Search for help finding the best personal loan and get prequalified loan offers in 2 minutes or less. [3]

4. Make sure you understand important terms.

Many homebuyers begin the process of getting a home loan with little or no knowledge of how mortgages work. Here are a few mortgage terms you should consider before signing anything with the lender. [6]

  • Annual percentage rate (APR) — The interest rate on a mortgage. This is the percentage of the loan amount that you will pay each year in interest.
  • Adjustable Rate Mortgage (ARM) — also known as a variable-rate mortgage. Interest rates on an ARM change based on a specific index or benchmark interest rate. With an ARM, the buyer’s payments may fluctuate significantly over the loan term.
  • Closing costs/settlement costs — This covers any costs associated with buying or selling a home and can include origination fees, escrow payments, attorney fees, appraisal fees, title insurance, and any other fees required by the lender to complete the transaction. Review these with your mortgage broker to better understand each fee’s purpose.
  • Fixed rate mortgage (FRM) — Interest rates on an FRM stay the same through the life of the loan.
  • Mortgage Term — The length of the mortgage loan in years. Common term lengths are 15, 20, and 30 years.

If you aren’t sure what a term means, you should ask your mortgage broker; you can also search for it online.

5. Use internet research to help find a real estate agent.

You want to find a real estate agent who understands the market and what you want. Get customer reviews on specific agents in your desired location and discover their recent sales online.

Have you ever seen a house for sale and wanted to learn more about it but didn’t want to call the selling agent? With Homesnap, take a photo of the home, and you’ll get instant information about the property.

6. Take a closer look during the neighborhood search.

You may think you’ve found the right home in price, size, and style. But sometimes, less obvious details are more important than what is readily apparent. It may take extra legwork to uncover important points or to confirm your initial judgment about a property; start with a neighborhood search.

You might take a closer look at whether a neighborhood fits your lifestyle. Is it close enough to shopping? To parks and recreational opportunities? Is the neighborhood close-knit? What types of individuals live in the community? Speak with local homeowners about their likes and dislikes.

Calculate your commute to your job. Longer commutes can add stress and additional costs to your budget when paying for gas, parking, or public transportation.

Check the quality of the local schools regardless of whether you plan to have children. Areas in higher-quality school districts often maintain higher property values. However, when considering school districts, you may also want to assess property taxes; in some communities with outstanding public schools, property taxes may be as high as private school tuition.

Finally, visit the neighborhood throughout the day, especially in the evening. The atmosphere could be very different after dark. You want to feel comfortable at all hours.

7. When negotiating a home’s price, act quickly and walk away when necessary.

As a first-time homeowner, list your must-haves, nice-to-haves, and deal-breakers. Then, if a house fits your needs and budget, don’t be afraid to make an offer. In hot real estate markets, and especially in high-demand neighborhoods, you have to move fast to get the house you want.

However, if you make an offer and find something about the house is a deal-breaker, such as a compromised foundation, don’t be afraid to walk away. It’s much easier to change a visually imperfect house into a comfortable and stylistically pleasing home than to deal with much more serious fundamental flaws.

It’s also easy to become emotionally attached to a house when negotiating home prices. Getting caught up in a bidding war over a property can devastate your budget. Before making an offer, have a clear expectation of how much you’re willing to pay should another buyer outbid you. Then, if you’ve hit your maximum, do yourself and your budget a favor and walk away.

It may seem strange to make one of the most significant purchases of your life after spending so little time looking at it. But when buying a house, you will often need to make an offer after only spending around an hour or so inside. But if you make your offer contingent on inspection, you can withdraw the offer should the inspector find something wrong with the home. This is a critical step that can secure your bid on a property while mitigating the risk of unknown flaws in the house.

8. Have a professional home inspection.

Home inspections allow a buyer to identify and assess any significant issues with a home before closing. Hire an unbiased construction expert or professional inspector to thoroughly inspect the foundation, roof, other major structural components, and electrical and plumbing systems. Your agent will likely have a recommendation for the inspector.

Stay professional home inspection process and ensure that the contractor you hire is looking at hard-to-see areas. Don’t hesitate to ask any questions. If you have concerns about something, it’s better to ask them before the sale is complete.

Avoid using inspectors recommended by the seller’s agent or employing someone unqualified. That can result in a less thorough inspection and, in some cases, raise conflict-of-interest issues. [4]

9. Check local zoning ordinances.

If you plan to make improvements, such as adding a bedroom or expanding a home’s footprint, contact the local zoning board before you buy. Most municipalities try to work with homeowners, but ensuring your project meets local guidelines is best. That may be particularly important for homes in hillside communities or near water because those areas may have more restrictive ordinances.

10. Don’t underestimate the hidden costs.

Even after you find a desirable home that fits your budget, you’ll still need to account for other costs, such as closing costs, property tax, utilities, mortgage insurance, homeowners insurance, and a maintenance fund. Allocate about 1% to 4% of the purchase price for annual maintenance. [7]

Closing costs are typically about 2% to 5% of your loan amount, with a smaller percentage for larger loans. Some closing costs are set in stone, but many aren’t. Lenders have a lot of flexibility over the fees they charge. Borrowers like you can shop around for the lowest closing costs as well as the lowest rate. [5]

11. Protect your new home.

Purchasing a first house ranks among life’s most memorable moments. But, after all the work it took to buy your first home, ensure it is protected. If you have questions about homeowners insurance or other aspects of starting life in your new home, Nationwide has resources to help you make the right decisions.

Sources:

[1] “First-Time Homebuyer’s Guide,” Amy Fontinelle, investopedia.com/updates/first-time-home-buyer (Nov. 4, 2022).

[2] “How much money do you need to buy a house?” David McMillin, bankrate.com/mortgages/how-much-money-do-you-need-to-buy-house (June 1, 2022).

[3] “U.S. mortgage statistics and FAQs,” David McMillin, bankrate.com/mortgages/mortgage-statistics (July 11, 2022).

[4] “What Is a Home Inspection Contingency and Why Is It Important?” Amy Fontinelle, investopedia.com/articles/mortgages-real-estate/08/home-inspection.asp (Aug. 12, 2022).

[5] “Average closing costs in 2023: Complete list of closing costs,” Gina Freeman, themortgagereports.com/35800/guide-to-mortgage-closing-costs-what-average-mortgage-costs-are-and-how-to-keep-yours-low (Oct. 17, 2022).

[6] “Mortgages key terms,” consumerfinance.gov/consumer-tools/mortgages/answers/key-terms/ (Mar. 7, 2023).

[7] “How much does the average home cost to maintain per year? $3,000, according to Angi,”usatoday.com/story/money/personalfinance/real-estate/2022/02/12/average-american-home-costs-3-k-per-year-to-maintain/49780837/ (Mar. 8, 2023).

Disclaimer:
The information included here is designed for informational purposes only. It is not legal, tax, financial or any other sort of advice, nor is it a substitute for such advice. The information may not apply to your specific situation. We have tried to make sure the information is accurate, but it could be outdated or even inaccurate in parts. It is the reader’s responsibility to comply with any applicable local, state, or federal regulations. Nationwide Mutual Insurance Company, its affiliates, and their employees make no warranties about the information nor guarantee of results, and they assume no liability in connection with the information provided. Nationwide and the Nationwide N and Eagle are service marks of Nationwide Mutual Insurance Company and Shield Insurance Agency. © 2023


Recent Blogs from Shield Insurance Agency

Read More
When a Car Recall covers your auto.

When a Car Recall includes your auto.

Nationwide | January 27, 2023 | Car Recall | Auto Insurance | Start your quote today!

A car recall can hit home, but the process may be relatively painless.

It can be quite unsettling to discover that your car has been recalled. And it’s happening more than ever: There were over 400 recalls in the U.S. in 2022 according to the National Highway Traffic Safety Administration (NHTSA). Recently, the NHTSA issued a recall on Takata airbags, one of the largest and most complex safety recalls in U.S. history, affecting approximately 47 million vehicles. Visit NHTSA for details and see if you’ve been impacted. [1]

“With so many new cars on the market every year, the chance of yours being recalled at some point during its life span is pretty good,” says consumer auto expert Kristin Varela of Cars.com.

What is a car recall?

For starters, car recalls can result from a number of events. Car manufacturers will put their products through multiple tests and may issue a recall based on subsequent findings. NHTSA can also ask for a recall after investigating a number of complaints from owners. If your vehicle is subject to a recall, don’t panic; it doesn’t necessarily mean that the car has a defect. Sometimes a recall is intended to check for potential defects, Varela says.

“Recalls are issued because the defect or possible defect might make the vehicle unsafe in some way,” she says. “You don’t have to wait to be contacted by mail, which happens 2 or 3 months after a recall is announced. After all, chances are that you’re transporting your most precious cargo: your family. It’s always better to be safe than sorry.” To stay connected, NHTSA provides recall notifications and updates. You can sign up there to receive notifications via email or have alerts sent directly to your phone through NHTSA’s Safer Car app.

What happens if your car is recalled?

The recall letter should have instructions on how to proceed. Typically, you will be advised to take your vehicle to an authorized local dealer to conduct a maintenance check for defects, update software or replace parts. Make sure to call and set up an appointment beforehand. 

Is there a cost to car recall?

For any recall, defective parts are replaced at no cost to the owner. As for anything else, that depends upon the manufacturer in question. However, automakers have been known to provide free rentals, taxi reimbursements, and even the free pickup and return of the vehicle in question.  

In addition to paying attention to vehicle recalls, having the right auto insurance is another safety essential. Learn about Nationwide’s available car insurance coverage options today. 

Sources:

[1] “Automakers With The Most Recalls In 2022,” carpro.com/blog/automakers-with-the-most-recalls-in-2022 (Jan. 5, 2023)

Disclaimer:

The information included here is designed for informational purposes only. It is not legal, tax, financial or any other sort of advice, nor is it a substitute for such advice. The information may not apply to your specific situation. We have tried to make sure the information is accurate, but it could be outdated or even inaccurate in parts. It is the reader’s responsibility to comply with any applicable local, state, or federal regulations. Nationwide Mutual Insurance Company, its affiliates, and their employees make no warranties about the information nor guarantee of results, and they assume no liability in connection with the information provided. Nationwide and the Nationwide N and Eagle are service marks of Nationwide Mutual Insurance Company and Shield Agency. © 2023


Visit more Shield Insurance Blogs

Read More
How to use car wax

How To Use Car Wax

Nationwide Blog | March 22, 2023 | Car Wax | Auto Insurance | Start A Quote Today!

If you just bought a new car or had it painted, you want to keep it looking new for as long as possible. Waxing your car with car wax can be very beneficial to maintain that fresh look.

What is Car wax? And what does car wax do?

Car wax, or automotive wax, can be natural or synthetic and is designed to protect the body parts of a vehicle and enhance the paint’s shine. [1]

Waxing your car is a great way to keep it looking sharp, but did you know it has many more benefits? In addition to giving your car a beautiful shine, waxing helps by:

  • Protecting the paint from airborne contaminants and the elements. By forming a protective coat, it prevents corrosive elements (such as salt or tar) and bugs from becoming embedded in your paint.
  • Preventing paint chipping. It also slows the effects of smog, wind, rain, and sun on your finish.
  • Filling in scratches. While you can’t remove minor scratches from your car by waxing, you can help make them less noticeable.
  • Expediting the car-washing process. Without a coat of wax, it’s harder to remove impurities like bugs, sap, and other unwanted substances that can collect during your daily drive.

What are the different types of car wax?

Waxing your vehicle will make it shine and protect the finish from various environmental hazards, mainly birds, tree droppings, and pollutants. There are plenty of car wax types on the market; here are the pros and cons of each. [2]

Liquid car wax

Liquid wax is the best for cleaning, gloss, and durability, but it’s somewhat challenging to apply. Some liquid waxes are also slightly abrasive, which could damage your car’s finish.

Paste waxes

Paste waxes are very easy to apply, but they tend to lose their luster sooner than liquid waxes. It may also contain abrasive components, so be careful when applying it to your car.

Spray waxes

Spray waxes work well for the paint on newer cars and are the quickest to apply, but they do not last as long as a liquid wax. In addition, spray waxes are typically nonabrasive.

Check with the dealership where you purchased your vehicle or the shop that painted it to get recommendations on which type of wax would be best for your vehicle’s finish and the environment you will be driving in.

How often should you use car wax?

To reap the benefits of waxing, you’ll need to maintain a regular schedule. Waiting until it looks like a fresh coat of wax will make your vehicle more vulnerable to small chips and fading paint.

Just as you have a regular maintenance schedule for your engine, it’s essential to have a regular schedule to maintain the exterior. How often you wax can depend upon several factors, including:

  • How often you drive your vehicle
  • Whether it’s parked in a garage or out in the open
  • The type of wax you use

If you want that fresh-from-the-showroom-floor look, some experts recommend you wax your car about once a month. Some of the newer synthetic waxes on the market claim they can keep a showroom-worthy shine for up to a year; others say every three months is sufficient.

One way to tell it’s time to wax your car is to see if water beads on the surface when it’s wet. If not, it’s time for a new coat of wax. [3]

How to properly wax a car

The easiest way to get a super shine is to go to a car wash that provides a professional wax service. But you can also do it yourself and get fantastic results. An electric polisher will make the job easier and faster, but you can also do it by hand and get a beautiful finish.

How to Wax a Car by Hand

  1. Wash your car.
  2. Apply the appropriate kind of wax.
  3. Work in sections and rub in the wax using polishing pads. [4]

How to Wax a Car with a Buffer

  1. Wash your car.
  2. Apply the appropriate kind of wax for a mechanical buffer.
  3. Buff in the wax, being sure to follow the instructions for your mechanical buffer. [4]

Car Waxing Tips

Keep these tips in mind for the best results:

Prep for your wax with clay

A clay bar is used as part of the cleaning process before waxing. Even after a thorough wash, your vehicle will still have some gunk embedded in the finish — which is where clay bars come in. Used with a lubricant, a clay bar grabs these particles out of the finish. As with the waxes, there are various levels of abrasiveness with clay bars, and you need to make sure you use one suitable for your vehicle’s finish.

Once you have “clayed” your vehicle, you can apply a fresh coat of wax to keep other contaminants out. While waxing cannot make your old car look new, it can protect the finish of a new or newly painted car for years to come.

Always wax your car in the shade

Try to wax your car under a protective cover, such as a carport, tent, or other structure. On a sunny day, your car can become hot, and when you apply wax to the hot surface, the wax will dry quite quickly. This makes it more difficult to remove.

Another reason to wax undercover is the possibility of bad weather. The wax can’t adhere properly to the surface of a wet car and can create a sloppy mess. It can also run off the body of the car and get on the molding and plastic parts, which can be a pain to remove. [5]

Apply car wax to small sections

Complete each section before moving on to the next to avoid having the wax dry. Adding more wax will not give you a better shine; it will just make it harder to buff the wax off. If you want more shine, add another coat, but check the label to see how long the first coat should be allowed to dry before applying the second one.

Make friends with microfiber

These are the best towels for polishing your car because they don’t leave behind lint and are great for buffing. Be sure to have plenty of towels on hand, so you’re not using a wax-caked towel.

Use a soft brush for gaps and molding

Keeping a soft brush handy while waxing your car can help get wax off molding and out of cracks. You can buy these brushes at most auto parts stores, which are typically inexpensive. Removing wax from a car’s molding after it’s dry can be tricky, and sometimes the wax will leave permanent staining. Instead, use a soft brush to remove wax from moldings or cracks before it dries to help avoid permanent staining.

Use a random orbital buffer to car wax

Waxing your car with a mechanical buffer can save time and effort, making waxing your car a breeze. Many people prefer rotary buffers; however, they spin in a circular motion at a high velocity, which can cause permanent “burn” marks from the edge of the pad digging into the paint. Rotary buffers can also cause swirl marks due to the pad becoming dry and making micro scratches in the paint.

To help prevent this, use a random orbital buffer, which moves the pad in a random pattern rather than a circular one. This results in an even application of wax without the risk of creating damaging marks. Both the rotary and random orbital buffers are similarly priced. [5]

How long does car wax last?

In each case, the time and care you spend waxing your vehicle will translate into how long the job will last. If you are willing to spend the time and elbow grease, you can expect your shine to last up to 3 months. A general rule of thumb is to wash your vehicle weekly and wax it every 8 to 12 weeks. [3]

Waxing your vehicle is a great way to ensure it stays shiny and looks great. Waxing helps protect your car’s paint from damaging sun rays, abrasive dirt, and chemicals in the rain and snow. Proper, regular waxing can extend the life of your car’s paint and help keep your vehicle looking sharp long into the future.

For more tips on keeping your car in mint condition, discover cleaning tools every car owner should have.

Sources:

[1] “The Truth About Car Wax: 9 Things You May Have Overlooked!” avalonking.com/blogs/guides/the-truth-about-car-wax (March 28, 2019).

[2] “How Car Wax Protects Your Car’s Finish,” turtlewax.com/blogs/how-to/how-car-wax-protects-your-car-s-finish (accessed Dec. 8, 2022).

[3] “How Often Should You Wax Your Car?” Jessica Shea Choksey, jdpower.com/cars/shopping-guides/how-often-should-you-wax-your-car (Dec. 18, 2020).

[4] “How to Wax a Car by Hand or with a Buffer,” Chloe Murphy, leasefetcher.co.uk/guides/car-maintenance/how-to-wax-car (Aug. 26, 2021).

[5] “How to Wax Your Car with Amazing Results: 7-Step Guide,” driving-tests.org/beginner-drivers/how-to-wax-your-car/ (accessed Dec. 9, 2022).

Disclaimer:
The information included here is designed for informational purposes only. It is not legal, tax, financial or any other sort of advice, nor is it a substitute for such advice. The information may not apply to your specific situation. We have tried to make sure the information is accurate, but it could be outdated or even inaccurate in parts. It is the reader’s responsibility to comply with any applicable local, state or federal regulations. Nationwide Mutual Insurance Company, its affiliates, and their employees make no warranties about the information nor guarantee of results, and they assume no liability in connection with the information provided. Nationwide and the Nationwide N and Eagle are service marks of Nationwide Mutual Insurance Company. © 2022 Nationwide

Check out more blog articles presented by Shield Insurance Agency

Read More