How to Paint an Aluminum Boat

How to Paint an Aluminum Boat

Nationwide | December 07, 2022 | Aluminum Boat | Boat Insurance | Start A Quote Today!

Aluminum fishing boats and pontoon boats provide an affordable, fun way to explore the water. Records show 85,431 aluminum boats were registered in 2021 alone. [1]

Proper maintenance is key to making sure you can get ample enjoyment and use from it for years to come. To keep your aluminum boat in top condition, follow these tips for cleaning, polishing, and painting.

Clean and prepare your boat

Prior to polishing and painting your boat, make sure the surface is clean. Follow these steps to clean your aluminum boat:

1. Dry dock your aluminum boat

Pull your boat out of the water and prep a work area. This can be in a garage or a larger space that can get wet, such as a driveway or a dry-docking space at your local marina.

Elevate the boat off the ground in this workable space. If you need to use a sander or buffer, dry-dock your boat in an area where you have access to electricity.

2. Sand off loose paint and rust

If the boat has any rust, sand it off so you have a smooth surface. Depending on the sizes of the rusty patches, you might need a power sander and varying grit levels of sandpaper.

3. Wash the aluminum boat

You’ll want to clean all the grime and dust off. If you’ve waxed your boat previously, use a dewaxing solvent to remove traces of old wax. [2]

Mix mild soap and water in a spray bottle. Spray the boat and wipe it down with a sponge. This removes dirt but not hard stains. To remove tougher stains, mix a solution of 50% distilled vinegar and 50% warm water. Spray that mixture on the boat, let it sit for 60 seconds, and wipe it away.

Mild soap and vinegar are simple DIY solutions, but there are special cleaning products available too. Sometimes a stronger cleaner is necessary to remove oxidation. There are specific cleaners that can handle these dark patches, but they’re abrasive. Carefully follow the instructions on these products to keep yourself safe.

4. Rinse the boat

Grab a hose and rinse the cleaner from the boat. Be sure to use fresh water; you don’t want to use seawater or lake water. If you have the time, polish your boat once it’s dry.

Polish your boat

Follow these steps to polish your aluminum boat: [3]

1. Use aluminum boat polish

There are dozens of polishes on the market, but you need an aluminum-grade polish. You can also use an aluminum cleaner that can clean, polish, and protect your boat as an all-in-one option.

2. Apply the polish

To start, rub or paint the polish on the boat. You can do this by hand or with a power buffer. Polishing by hand can be rewarding, but it’s labor-intensive and can be more time-consuming. A power buffer can get the job done efficiently and quickly. However, you still might need to hand-buff nooks and crannies.

3. Work in small sections

Apply polish to small sections of the boat, working to completely cover each area before moving on to the next. Results should be instant as you work the polishing compound into the boat’s surface.

4. Check the boat

After applying the polish all over the boat, take a walk around it to make sure you haven’t missed any spots.

5. Let the polish dry

Let the polish dry completely, which usually takes 5 to 20 minutes. Be sure to check the instructions for your polish for the exact drying time. Wipe the boat down with a clean, dry cloth. [4]

Paint your aluminum boat

After your boat’s surface has been cleaned and polished it is ready to be painted. Plan for this project to take a few days. Follow these steps to paint an aluminum boat: [5]

1. Find a location for painting

Try to start this project when the weather forecast says there will be a few days of rain-free weather. Pick a work area that’s outside. It’s important that the work area is away from cars and buildings. Put a piece of plastic down to catch dripping paint. Elevate the boat so you have access to all areas of the hull.

2. Prepare the surface for paint

Before painting, remove rust, dirt, chipping paint, old wax and polish. Depending on the amount of rust present, you may need a power sander to create a smooth surface. Once you’ve removed rust, clean the boat by following the cleaning steps above.

3. Apply primer

Apply a self-etching, oil-based primer that sticks to aluminum surfaces. [6] Using a brush or a sprayer, apply a thin layer of primer inside the boat. Let it dry and then paint the outside. Let the primer dry overnight, or for at least 12 hours, before moving on to the painting process.

4. Apply aluminum boat paint

Choose a water-resistant marine paint that adheres to aluminum. Using a sprayer or brush, paint the inside of the boat first. Paint in horizontal strokes for an even coat. The inside coat should dry for around 12 hours before you paint the exterior. The outside coat needs to dry for the same amount of time. You may decide to add a second layer of paint to the boat for protection. If so, make sure the paint dries completely between applications.

5. Apply a clear coat

Once the painting is finished, apply a clear protective coat. This layer helps keep the paint intact and prevents scratches. Check the product label to determine how long this coat will need to cure before you put the boat in the water again.

A fresh layer of paint will help protect the exterior of your boat, but this is not the only way to protect it. Another component of caring for your boat is having boat insurance. Find out whether you need boat insurance before you put your boat in the water.

Frequently asked questions

Can you paint over old paint on an aluminum boat?

Painting over old paint on an aluminum boat is not advised; however, there are a few key things to consider if you do attempt it.

  1. What type of paint was the old paint? Will the new paint adhere or react to it?
  2. Is the old paint flaking or peeling? If so, the new paint won’t have a good surface to stick to.
  3. Are you planning on sanding the old paint surface or chemically preparing it for a fresh coat of paint?

If you know the paint types and there are no conflicts, it’s recommended that you sand the hull prior to painting so that the loose paint will flake off. [7]

Should you paint the bottom of an aluminum boat?

While many might think painting the bottom of your boat unnecessary, it’s actually an essential part of protecting your aluminum row boat from the elements. When choosing your bottom paint, make sure to pick one that is specifically designed for aluminum boats, as some bottom paints can cause corrosion on aluminum. In general, you’ll want to apply two coats for the best results. [8]

How to clean a painted aluminum boat

Maintaining your boat’s condition is important to keep it clean, especially for an aluminum boat, which can be easily damaged by dirt and algae. Follow the steps below to clean your painted aluminum boat:

  1. Remove the boat cover, motor, and any other large items
  2. Hose down the entire boat
  3. Scrub the hull with a smooth brush that won’t damage the paint
  4. Rinse the hull with clean water at a low pressure
  5. Dry the hull with a cloth
  6. Inspect the hull for any remaining dirt or debris
  7. Let the boat dry completely
  8. Wax the boat

Cleaning a painted aluminum boat isn’t difficult, but it does require special care. Avoid using harsh chemicals, and be sure to use the proper detergents and brushes. Waxing the boat will help create a barrier that will protect the paint from scratches and rust. [9]

Protect your boat

You have made this investment in your aluminum boat and carefully painted and cleaned it; now you need to protect it. Why? Boat insurance can be the difference between navigating a crisis peacefully and needing to pay tens of thousands of dollars if things go wrong. It could also protect against third-party liability for damage caused by you and your boat, which may be the bare minimum protection required to moor in your marina. Ultimately, boat insurance will give you peace of mind knowing you’re protected while you’re out on the water, no matter what occurs. [10]

Sources

[1] “The Glass is Still Half Full,” tradeonlytoday.com/columns-blogs/the-glass-is-still-half-full (July 18, 2022).

[2] “Polishing an Aluminum Boat [Guide],” boatlife.com/boatlife-blog/polishing-an-aluminum-boat-guide (accessed Aug. 4, 2022).

[3] “Cleaning an Aluminum Boat with Vinegar,” pontoonopedia.com/cleaning-aluminum-boat-vinegar (June 11, 2018). x

[4] “6 Steps to Painting Aluminum Boats,” chiyachtrefinishing.com/blogs/6-steps-to-painting-aluminum-boats (June 20, 2018).

[5] “How to Paint an Aluminum Jon Boat,” bottompaintstore.com/blog/aluminum-application/paint-jon-boat (accessed Aug. 4, 2022).

[6] “How to Paint a Boat,” boats.com/how-to/how-to-paint-a-boat (April 14, 2021).

[7] “How To Paint Over Your Aluminum Boat (Step-by-Step),” watercraft101.com/how-to-paint-aluminum-boat (accessed Aug. 4, 2022).

[8] “How to Apply Bottom Paint to an Aluminum Boat,” bottompaintstore.com/blog/aluminum-application/how-to-apply-bottom-paint-to-an-aluminum-boat (accessed Aug. 4, 2022).

[9] “How To Clean Painted Aluminum Boat? Complete Guide,” emozzy.com/how-to-clean-painted-aluminum-boat (April 9, 2022).

[10] “Why Boat Insurance Is Important & How To Obtain It,” wavetechpowersports.com/why-boat-insurance-is-important-how-to-obtain-it (accessed Aug. 4, 2022).

Disclaimer:

The information included here is designed for informational purposes only. It is not legal, tax, financial or any other sort of advice, nor is it a substitute for such advice. The information may not apply to your specific situation. We have tried to make sure the information is accurate, but it could be outdated or even inaccurate in parts. It is the reader’s responsibility to comply with any applicable local, state or federal regulations. Nationwide Mutual Insurance Company, its affiliates, and their employees make no warranties about the information nor guarantee of results, and they assume no liability in connection with the information provided. Nationwide and the Nationwide N and Eagle are service marks of Nationwide Mutual Insurance Company. © 2022 Nationwide and Shield Insurance Agency.

Read More
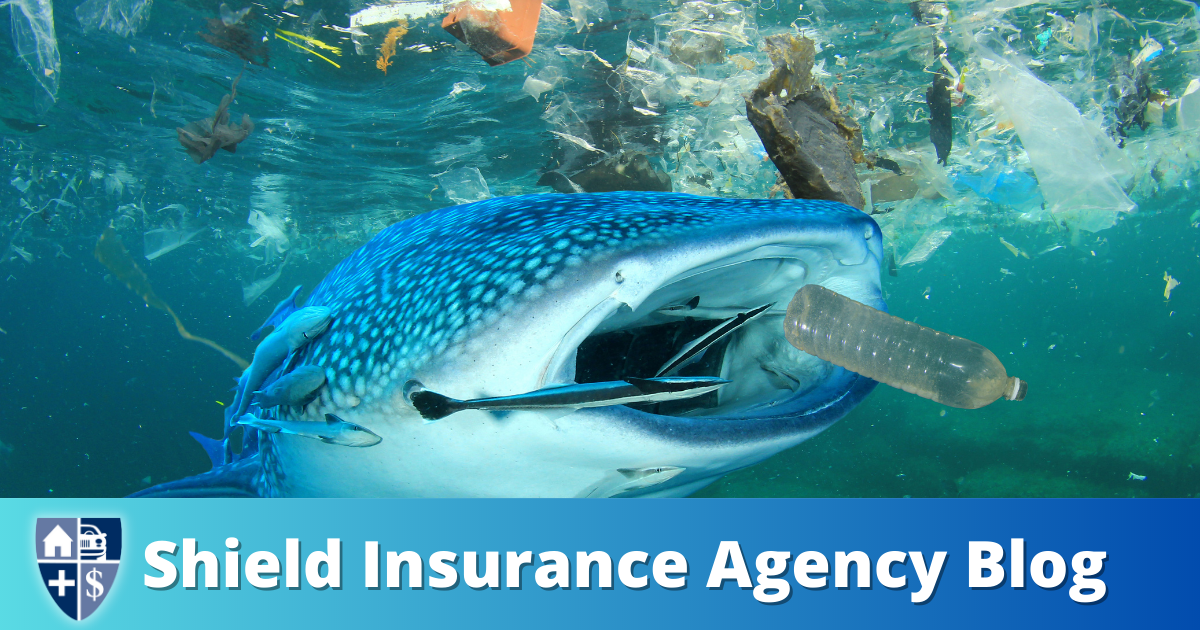
Microplastics are fragments of any type of plastic less than 5 millimeters (mm) in length and are an increasing topic of risk

Microplastics

Liberty Mutual Business | Commercial Insurance | Microplastics | Start a Quote Today!

Microplastics are fragments of any type of plastic less than 5 millimeters (mm) in
length and are an increasing topic of risk discussions due to their prevalence in
the environment and the negative impacts they potentially pose on the earth and its
inhabitants. The term microplastics was first introduced to differentiate these smaller
fragments from their larger counterparts, macroplastics, which describe larger plastic
waste, such as plastic bottles.

Two classifications of microplastics are
currently recognized

Primary Microplastics

Primary microplastics include any plastic fragments or particles that are already 5 mm (5,000 mm) in size or less before entering the environment. Primary microplastics are purposefully manufactured and can include feedstock for manufacturing plastic products, such as plastic pellets (also known as nurdles), microfibers from clothing, microbeads in personal care products, glitter, and industrial abrasives. Once in the environment, microplastics can degrade to be even smaller in size. 

Secondary Microplastics

Secondary microplastics arise from the breakdown of larger plastic products through natural weathering processes after entering the environment. Sources of secondary microplastics can include water and soda bottles, fishing nets, plastic bags, shedding of fibers from polyester/nylon clothing, and tire wear. Over time, a culmination of physical, biological, and photodegradation can reduce the structural integrity of plastic debris to a size that is eventually undetectable to the naked eye. This process of breaking down large plastic material into much smaller pieces is known as fragmentation. Microplastics can be further divided into four sub-groups based on particle size: 

  1. Large microplastics (100–5000 mm)
  2. Small microplastics (1–100 mm) 
  3. Sub-micron plastics (100–1,000 nm) (0.1– mm) 
  4. Nanoplastics (1–100 nm) (0.001–0.1 mm) Because of their smaller size, nanoplastics can present additional risks and challenges: 

They may bypass filtration methods intended for larger microplastics. 

They may be less likely to settle, have greater mobility, and may be transported further. • They may be more likely to enter and bioaccumulate in the food chain. 

Due to their higher surface area, faster leaching of plastic additives can occur. 

They may act as pollutant “vectors” because their higher surface area also allows for more adsorption of metals and other pollutants.

Microplastics can also be categorized according to type of polymer, additives used, and shape.

U.S. National Oceanic and Atmospheric Administration (NOAA) and the European Chemicals Agency (Note: 1 mm = 1,000 micrometers [mm] = 1,000,000 nanometers [nm])

Source of microplastics in the environment There are countless sources of both primary and secondary microplastics in the environment, including the following:

Cosmetics: Microplastic “scrubbers”, “microbeads”, or “micro-exfoliates” used in hand cleansers and facial scrubs have replaced traditionally used natural ingredients, including ground almond shells, oatmeal, and pumice. These products are typically composed of polyethylene, a common component of plastics, but they can also be manufactured from polypropylene, polyethylene terephthalate (PET), and nylon. The beads may be washed into the sewage system immediately after use. 

Textiles and clothing: Many synthetic fibers, such as polyester, nylon, acrylics, and spandex, can be shed from clothing and persist in the environment. The process of washing clothes causes garments to lose an average of over 100 fibers per liter of water. Each garment in a load of laundry can shed more than 1,900 fibers of microplastics, with fleeces releasing the highest percentage of fibers. 

Tires: Car and truck tires. which are composed partly of synthetic styrene-butadiene rubber, erode into tiny plastic and rubber particles as they are used. The estimated per capita emission ranges from 0.23 to 4.7 kg/year, with a global average of 0.81 kg/year. In air, 3–7% of the particulate matter (PM2.5) is estimated to consist of tire wear and tear. 

Plastics manufacturing: Plastic pellets (aka nurdles), 2.0–5.0 mm in size, which are used as a raw material to create other plastic products, can enter the environment through spills and other accidents. 

Air blasting: This process involves blasting acrylic, melamine, or polyester microplastic scrubbers at machinery, engines, and boat hulls to remove rust and paint. As these scrubbers can be used repeatedly until they diminish in size and their cutting power is lost, they may become contaminated with heavy metals such as cadmium, chromium, and lead. 

Fishing industry: Recreational and commercial fishing, marine vessels, and marine industries can be sources of macroplastics and secondary microplastics. 

Wastewater treatment plants: The size of microplastics prevents them from fully being retained by preliminary treatment screens at wastewater plants, thereby allowing some to enter rivers and oceans. Wastewater treatment plants only remove an average of 95–99.9% of microbeads. This leaves an average of 0–7 microbeads per liter being discharged. Sewage sludge that is reused as fertilizer after the wastewater treatment has also been known to contain microbeads. Persistence of microplastics in the environment Microplastics are persistent and ubiquitous in the environment, particularly in aquatic and marine ecosystems. The most significant transport pathways to surface water are presumed to be via dust and stormwater runoff. It has been estimated that there are 51 trillion individual pieces of microplastics in the world’s oceans, estimated to weigh 236,000 metric tons. Microplastics can also accumulate in the air and terrestrial ecosystems but the cycle and movement of microplastics in the environment is still not fully understood. Microplastics have also been found in deep layer ocean sediments and in the high mountains, at great distances from their source. According to the U.S. EPA: 

Of the total plastics released to oceans (4.8–12.7 million tons (Mt)/year), 15%–1% originate as microplastics from homes and industrial products. 

About half of the total (3.2 Mt/year) microplastics released, or about 1.5 Mt/year, ends up in oceans. The following are the estimated sources of microplastics to oceans:

  • Washing synthetic textiles (35%) 
  • Tire wear (28%) • City dust (24%) 
  • Road Markings (7%) • Marine Coatings (3.7%) 
  • Microbeads (2%) 
  • Plastic pellets (0.3%) It has been estimated that 80% of microplastic pollution comes from textiles, tires, and city dust

here for the full story…

More fascinating blogs with Shield Insurance Agency

Read More
Top Five Uses for a Trailer Hitch

Top Five Uses for a Trailer Hitch

Foremost | by Rachel Neva | Trailer Hitch | Auto Insurance | Click here to start a quote today!

A trailer hitch just might be the most inventive way to add more cargo space, value, and extra opportunities for fun to your vehicle. While some vehicles like trucks and SUVs may come with a factory-installed hitch or tow package, it’s very common for drivers to install a hitch or tow package to their vehicle as an after-market accessory.

Wondering what the difference between a hitch and a tow package is? Depending on what you plan to tow, you may need more than a standard hitch with a trailer ball attached to your vehicle. In addition to the tow hitch itself, a tow package (especially if it’s factory-installed) may include things like a wiring harness and circuitry to power the lights and accessories on a trailer, heavy-duty suspension and brakes to handle the extra weight, an enhanced engine and transmission cooling system, larger battery and alternator to help power your vehicle and what you’re towing with ease, and additional driver-assistance systems that can help with overall spatial awareness while towing.

Depending on what you’re towing and where you’re going, this article provides some helpful information if you’re deciding between a factory-installed tow package or an aftermarket tow package for your vehicle.

If you’re thinking about adding a hitch to your vehicle … here are our top five uses for a trailer hitch:

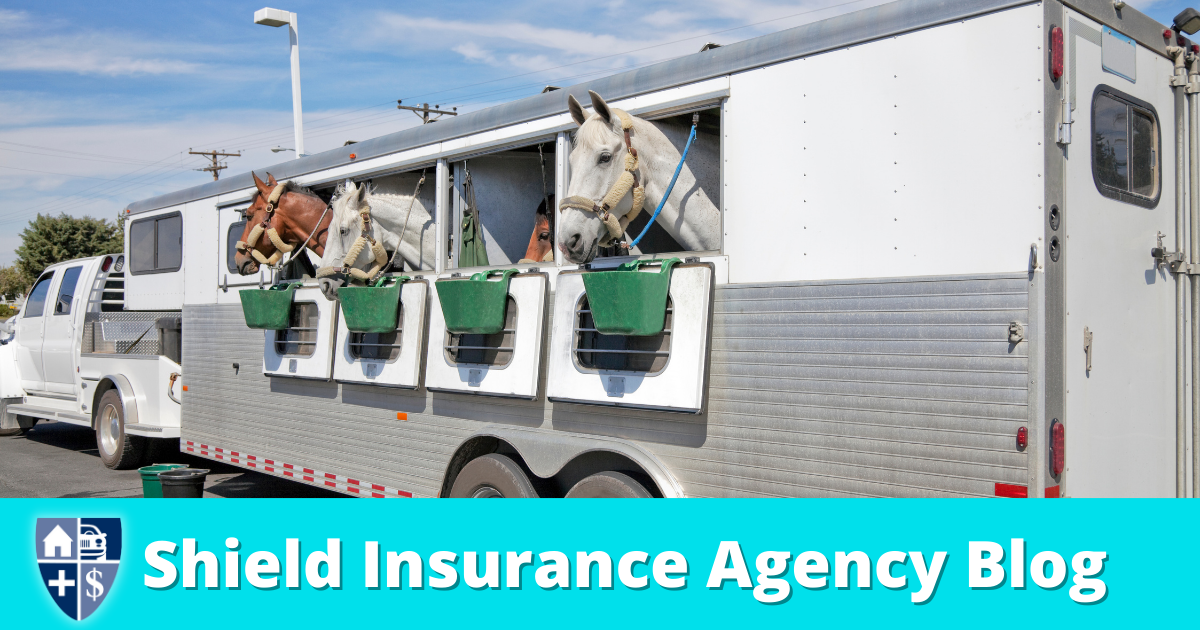
  • Hitch-mounted bike rack — If you like to hit the mountain bike trails, go on scenic family bike rides in your area, or take bikes along on family vacations, a hitch-mounted bike rack is an easy way to transport bicycles of all kinds. While this type of bike rack extends the overall length of your vehicle (something to be aware of when parking), loading and unloading bikes can be much easier than bike racks that are mounted on a vehicle’s roof.
  • Utility trailer — A small utility trailer can be ideal for many towing tasks such as hauling plants and supplies for a garden or landscape project (and any debris resulting) or moving large items that won’t fit in your vehicle, like furniture or appliances.
  • Travel trailer — From pop-up camper trailers to luxury, fifth-wheel travel trailers, there’s a camping travel trailer to fit almost every kind of person who enjoys camping and exploring the great outdoors.
  • Boat trailer — If you don’t live on a lake or body of water but want to take nearly any kind of boat — a small fishing boat, a ski or wake boat, a pontoon or sailboat – out on the water, you’ll need a trailer that’s specific to the boat. Unless you have a boat slip at a marina that offers haul-out and storage service, you’ll likely need a trailer for your boat at some point.
  • Off-road vehicle trailer — There are many types of off-road vehicle trailers from simple, utility-type trailers for things like ORVs and off-road motorcycles to enclosed cargo-type trailers for ORVs and snowmobiles. If you like to explore new trails on your ORV or snowmobile, you may want to invest in a trailer to haul them with you wherever you go.

If you add a trailer hitch to your vehicle and have questions about insuring the things that you’ll tow, give Shield Insurance A call to shop for coverages that can help you protect the things you tow.


More great articles by Shield Insurance Agency

Read More
Coexisting with bicyclists

Coexisting with bicyclists

Foremost Insurance Blog | by Jenean McLoskey | bicyclists | Start an Insurance quote now! | Shield

Cycling has grown significantly in popularity over the past decade. Towns across the country are adding bike lanes to their roads to become more bike-friendly, and more and more people are ditching their cars and using a bike as their primary form of transportation. According to USA Today, larger cities like Portland, Ore., and Minneapolis have more than doubled their rate of bike commuters since 2014 — and as a cyclist, I can’t help but get excited.

Now, with bike riding growing in popularity across the U.S. — it may be a good idea to brush up on some traffic guidelines to avoid any accidents.

When you purchase a bike, you’re likely not required to take a safety class before you ride it. And, for drivers, the instructors touched on bike safety as part of Drivers Ed, but who remembers details from a course they took in their teens?

My point is, adults aren’t given much guidance when it comes to cyclists and cars coexisting on the roads. And as a bicyclist and a driver, I did some research because honestly, I needed a refresher myself.

Safety tips for DRIVERS:

  • Try to be 3 feet or more away from a bike.
  • Try to pass on the left when possible.
  • Blind spots are always lurking, make sure to watch for bikes.
  • Only pass a bicyclist when your passing lane is free and clear.
  • Look in your mirror for cyclists when you’re parking.
  • Always think of cyclists as equals – remember, they have rights on the road too!

Safety tips for BICYCLISTS:

  • Make sure to ride with the flow of traffic.
  • Traffic signs and signals aren’t just for cars. Stop on red to be safe.
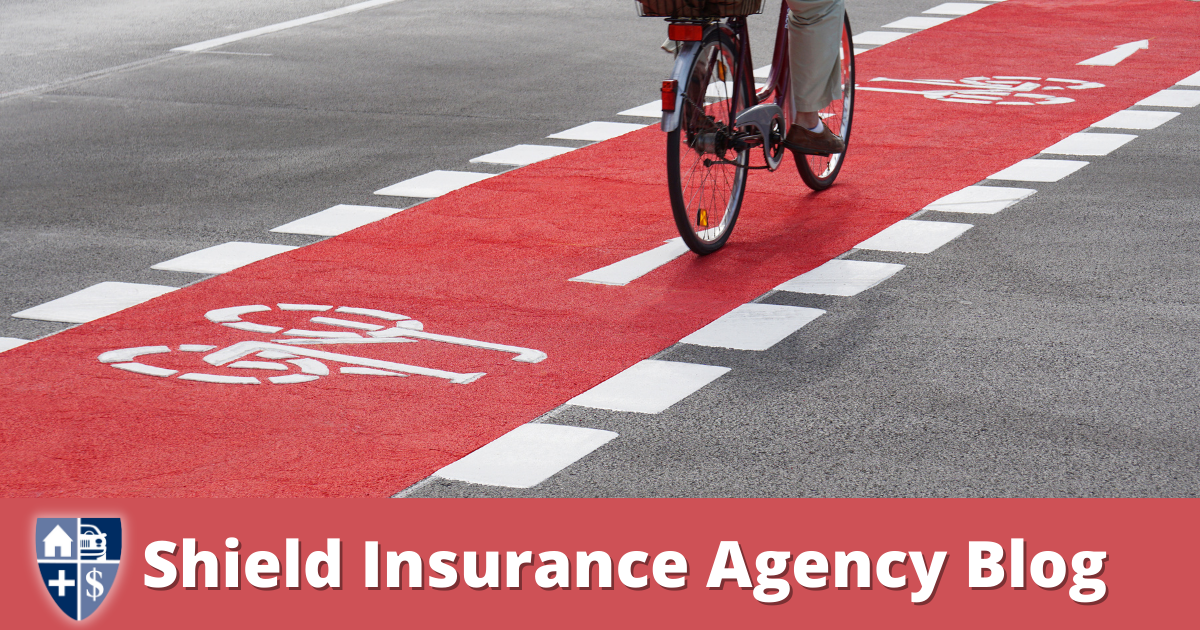
  • Use marked bike paths or lanes if they’re available.
  • Use your arm to make turn signals and take advantage of turn lanes so cars are aware of what you’re doing.
  • Consider using a mirror to monitor the cars behind you.
  • If you’re riding at night or in a storm, make sure to use some sort of flashers.
  • Watch for parked cars.
  • And most importantly — stay alert at all times.

If you’re unsure about your city’s or state’s traffic laws, it doesn’t hurt to look them up beforehand. No matter what you drive, be sure to enjoy the roads out there safely!


More great reads…

Read More
Five coolest places to travel in the U.S.A.

Five coolest places to travel in the U.S.A.

Foremost Creative Team | travel | Start a Quote Today! | Shield Insurance

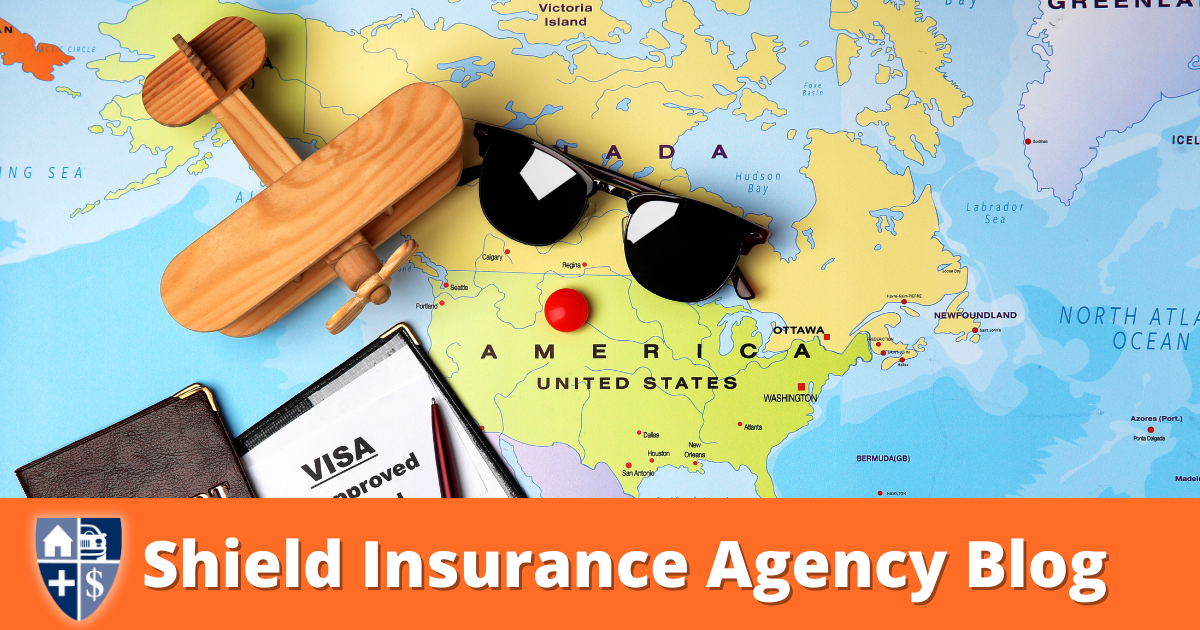
Ah, summer. It’s the time of year the whole country comes alive and beckons us to get on the road and experience it. That’s why we put together this list of what I consider the five most incredible places to visit in the U.S. If you’ve never been to these places, now is the time to pack those bags, explore and enjoy your summertime travels!

Travel to New York City

You have to experience the “Big Apple” at least once. It has everything you could ever want from a big city—museums, Broadway shows, restaurants with every type of food you can imagine, specialty boutiques, and high-end shops. Plus, you need to see the Statue of Liberty in person and check out those neon lights of Times Square. Make Central Park one of your main destinations. Remember to see the amazing works of art at the Met and the Guggenheim. This is a city that never sleeps with endless things to try and taste.

Travel San Francisco

The home of the Golden Gate Bridge offers gorgeous sights across its renowned hilly landscape and so many fun things to do, like riding cable cars, checking out Alcatraz Island, strolling along Fisherman’s Wharf and driving up the famously steep and crooked Lombard Street. Just a few miles north, you can leave the hustle and bustle behind to visit the towering Redwood trees in Muir Woods. Or for some tranquility within the city, plan a picnic at Golden Gate Park and see lakes, museums, monuments and the Steinhart Aquarium. For another great view of the city, check out Strawberry Hill in the middle of the park.

If you’ve never been to these places, now is the time to explore! If you’re traveling by car, motorcycle or RV, contact your local Foremost agency to get the right coverage for your ride!

Travel to Grand Canyon

If it’s the natural beauty you’re looking for, you’ll definitely find it at the Grand Canyon in northern Arizona. If you weren’t seeing it with your own eyes, you’d swear it was a painting in glorious shades of red and orange. Nothing can top the magnificent views as you gaze through the canyon over the Colorado River. Visit the South Rim where you’ll find Grand Canyon Village and the Bright Angel Trail. And if you’re into roughing it in the wilderness, you’ll want to head to the North Rim for backcountry camping and some serious hiking.

Yellowstone

Yellowstone has 2.2 million acres of paradise for you to explore—crystal blue lakes, tumbling waterfalls, majestic mountains, hot springs, abundant forests, open meadows, and active geysers. There are so many trails, it could take weeks to travel them all. Check out everyone’s favorite spots like Old Faithful, Yellowstone Lake, and Mammoth Hot springs. Then visit lesser-known areas like the West Thumb Geyser Basin, the Lewis River Channel, and the Dogshead Loop. You will likely be treated to sights of wildlife during your journey since over 60 types of mammals call the park their home. You could see buffalo, elk, coyotes, badgers, and perhaps a few bears along the way.

Washington D.C.

Our country’s capital has earned its place on the list of exciting East Coast vacation destinations. Not only can you soak up loads of our country’s history by checking out the classic attractions like the White House, Lincoln Memorial, and the Washington Monument, but you can also enjoy the many hip restaurants, cafes, clubs, and boutiques. Endless opportunities abound to learn about our past at museums like the Smithsonian, the U.S. Holocaust Memorial Museum, the Newseum, and the Mount Vernon Estate. It’s impossible to leave the city without feeling a deeper connection to our roots and pride in our home country.

Now that you know where to go, get those bags packed and enjoy your summertime travels!


Read More
Top eight towing mistakes people make

Top eight towing mistakes people make

The Foremost Creative Team | towing mistakes | Auto Insurance | Start a Quick Quote here!

The idea of hauling something huge behind your truck or SUV may sound like a fun adventure, but for those who aren’t familiar with the complexities of towing, it can actually be pretty intimidating! According to Complete Trailers LLC, there are eight common mistakes people make while towing. To avoid costly damages, read this list before you hitch and go:

Towing Mistakes: Overworking Your Engine

The number one towing mistake people make is overworking their tow vehicle. Overextending your vehicle can start a landslide of engine problems. This mistake could lead to a meltdown on the side of the road and potentially require a brand-new transmission. To avoid this, keep an eye on your pressure, temperature gauges, and exhaust gas temperature gauges.

Towing Mistakes: Weight Distribution Bars

If you don’t have your weight distribution bars set up right, you’re bound to have your vehicle and trailer bouncing from each other. Your ride will be bumpier than usual and the hitch and frame can be damaged from this too. And when it comes to weight distribution bars, bigger is not better. The bars with chains are tunable and come in various strengths and weights. If you properly load the correct bar size, they’ll be parallel to the trailer’s frame.

Towing Mistakes: Checking or Maintaining Brakes

Brakes are the most essential and overlooked safety system. Trailer brakes don’t self-adjust like the brakes on your tow vehicle. In fact, they must be manually adjusted by you. Additionally, trailer brakes wear out just like any other brake does, so be sure to check for wear and tear regularly.

Poorly Loaded Vehicles us a towing mistake

It’s crucial for safety and damage prevention to always put a balanced load on your trailer. Read up on weight restrictions and follow them closely because if you don’t, your tow vehicle won’t last very long.

Wrong Ball/Ball Mount

Make sure that you have the right ball and mount for your trailer. There are three different sizes of balls: 1 7/8 inches, 2 inches, and 2 5/16 inches — each with a different weight rating. Using the wrong mount or ball will pitch your trailer up or down on your axles and it also puts extra stress on your brakes and tires, which eventually reduces your braking ability. If you use multiple trailers, carry multiple mounts.

“Racing” While Towing

We know how exciting it is to get to a destination, but remember, slow and steady wins the race! Speeding up or down a grade is the last thing you want to do because it’ll ruin the longevity of your tow vehicle.

Low-Pressure Tires

If you maintain the right tire pressure on both your tow vehicle and trailer, you’ll have even tire wear, which means you’re less likely to have blowouts from overheating. This scenario is especially dangerous when it happens on your rear trailer tires, so make sure to pay special attention to them. Tires degrade more quickly when not in use. Before you hitch and go, remember to always inspect your tires and pressure.

Not Lubing Your Components

Like any well-oiled machine, taking preventative measures with your trailer and tow vehicle goes a long way. Axles and all pivot points where steel meets steel (or rubber bushings meet steel) should be greased.

Shield Insurance Agency wants you to travel and tow safely.


More great articles are at the Shield Insurance Agency Blog

Read More
ATV Trail Riding Survival Kit

ATV Trail Riding Survival Kit

Foremost Insurance | by Marrio Roberts Jr. | Survival Kit | Recreational Vehicle Insurance | Start A Quote

ATVs and other off-road vehicles are adaptable to many situations. With that being said, you can’t always predict what will happen on off-road adventures. If you need to perform emergency maintenance, it will help to be equipped with the proper tools. To prepare yourself in advance, Foremost® Insurance recommends keeping the following items in your ATV emergency kit.

Air pump and tire repair kit.

When traveling off-road you’re more likely to encounter various bumps in the road, like rocks or even holes, that can flatten your tire. If you have a tire repair kit handy, you should be able to patch small holes. Many repair kits come with air pumps, but it may be a great idea to bring an extra one just in case.

Tool kit within the Survival Kit

It helps to have a tool kit handy if you can. If you need to remove a tire or access a part of the vehicle that’s enclosed under something else, you may need more than just your hands to get the job done.

Duct Tape.

While we don’t recommend using duct tape for any serious repairs, it may be able to temporarily patch a leak in a water hose or radiator bottle, for example, which can buy you enough time to get to a repair shop. Additionally, duct tape can be useful if you or someone else falls off a vehicle. We highly recommend seeking professional medical attention in this situation, but if someone twists their ankle, using duct tape can help to stabilize it until you get to a medical facility.

A knife.

A knife can be useful if you or someone you’re with has an injury, as it can be used to cut bandages and wrap tourniquets. Whether you opt for a Swiss army knife or a regular pocket knife is up to you. A Swiss army knife may apply to more situations overall, but in terms of practicality, a pocket knife may be enough.

Jumper cables as part of the Survival Kit

Of course, jumper cables will be useful if you or someone else’s vehicle loses battery power. We recommend always keeping these with you.

First aid kit within the Survival Kit

First aid kits can be useful for treating minor scratches and bruises. With the unpredictable terrain of off-road adventures, you never know when you’d need these.

Bug spray.

It’s not uncommon to encounter bugs when you’re off-roading. If you don’t want those pesky creatures bothering you, keep some bug spray in the vehicle. This way if you forget to put some on before you head out, or if it wears out, you’ll always have some to reapply.

Spare tire.

While we do advise keeping a tire repair kit, they don’t work in every situation. There may be times when a tire is damaged beyond repair. In this case, you’ll need a spare tire.

Spare parts for the survival kit

You should keep a spare of the following parts: belt, spark plug, tie-rods, and ball joints. While these require a bit of handy work to replace, if you don’t have any spares on hand, you may become stranded.

Tow strap.

If you do become stranded, you will need someone to tow your vehicle to a safe place. We advise you to keep a tow strap on hand in case this happens.

To lessen your chances of having emergency situations, please ride safely.

If you’re looking for ATV insurance, UTV insurance, or insurance for another off-road vehicle (ORV), you can get a quote with Shield Insurance Agency today!


More great articles featured by Shield Insurance Agency

Read More
Tips on filing claims

Tips for effectively filing claims

Foremost Insurance | Ryker Huizinga | Filing Claims | Homeowners Insurance | Get A Quote

Experiencing a loss can be stressful, frustrating, and disheartening, but having insurance coverage will help alleviate the financial burden a loss can cause. The first step in restoring your property and moving forward is to determine if your policy provides coverage for the loss. To do this you need to file a claim with the insurer.

While the claims process isn’t something many eagerly look forward to, there are definitely ways you can make it a less stressful experience. To help you successfully navigate the process, here are several tips for effectively and efficiently filing claims.

Keep an inventory of all your insured possessions.

Be proactive! If you keep a written document of your possessions, it can help make the claims process much easier if you experience a loss. Go from room to room and record each item and its value to prepare an inventory. An easy way to do this is to take photos or videos of each room and all of the contents in the rooms. Consider keeping receipts with the purchase date and original cost for your records too, in case of total loss. Your inventory list should be consistently updated, which can be done easily if you record new items shortly after purchasing them. Pro Tip: Your inventory should be easily accessible. It is a good idea to keep a couple of copies of your inventory at different locations, with one location being off-premises in case of a total loss, like a fire.

Before filing claims reach out to your agent.

In the event of a potential claim, it’s best to contact your agent directly instead of the broader insurance provider. Your agent will be able to explain your options and advise on whether filing a claim is in your best interest. In some cases, your agent may even file the claim for you.

Report your loss promptly.

Always file your claim as soon as you possibly can. Of course, theft losses should be reported to the police first, and in other situations of danger and urgency, safety takes priority. But once it’s safe and reasonable to do so, you should contact your insurance agent. This is important because your policy might require you to make the notification within a certain amount of time. Not filing a claim within the time required in your policy may lead to a denial of the claim or may result in the claims process taking longer.

Be prepared for filing claims with the right information.

When you file your claim or make follow-up calls regarding the process, be sure to have the right information so your conversation is easier and more effective. Have your inventory list and the details of your loss, and keep the following information handy for your claims representative:

  • The customer’s name and address
  • The policy number
  • The date the loss happened
  • A description of what happened
  • A preferred telephone number for future contact

Provide complete, correct information.

Explain the situation accurately without downplaying or exaggerating your loss. Incorrect or incomplete information may cause complications and delays in processing the claim. Additionally, materially misrepresenting the facts of your loss may result in a loss of coverage.

Record important details from all correspondence.

While going through the claims process, be sure to write down important information from your phone conversations and in-person meetings with claims representatives and other contacts. This should include the time and date, as well as the name and title of the person you spoke with. This will help you stay organized and create records that may come in handy later.

Make appropriate emergency repairs.

If you’re dealing with property damage it may be necessary to make immediate emergency repairs to prevent additional damages, such as calling a plumber to repair a broken pipe. Your policy might cover the costs of these emergency repairs, so be sure to inquire about them when filing the claim. It is also important to take photos or even videos before making the repairs and save the receipts from all of the work that is done.

Ask questions about filing claims

Don’t be afraid to ask your claims representative for more information or clarification. The process will go much more smoothly if you are both on the same page and fully understand each other. For example, if there is a disagreement about the coverage of the claim, ask for the specific language in the policy that is in question to find out if it is a matter of differing interpretations.

Overall, it’s important to have patience because every insurance claim is different! Some may be completed quickly, while others may take a few weeks or even months to be resolved. You never know when problems will arise, but these tips can help you to effectively address the situations and smoothly navigate the claims process.


More Blogs from Shield Insurance Agency

Read More
Five Ways to Cook While on the Road

Five Ways to Cook While on the Road

 by Jenean McLoskey | Cook | RV Insurance | Shield Self Quoting Portal

Traveling on the road in your Recreational Vehicle can get pricey if you eat out for every meal, but cooking your own meals may require some creativity. While many RVs do have full, functional kitchens, some may not have that option. However, there are other ways to cook your meals in and around your RV safely, even if you don’t have a source of heat.

Here are five unique ways you can cook delicious meals while you’re on the road!

  1. Propane StoveIf you already have a stove in your RV, use it to your advantage! The burners are most likely smaller than your regular stove at home, so be sure to buy the appropriate-sized cookware for it. Keep in mind that if you have a refrigerator in your RV, it most likely runs on propane too. Be sure to bring enough propane tanks on your trip if you plan on using both!
  2. Portable Grill No stove? No problem! There are plenty of electric grills you can bring on the road to cook all of your favorite foods. Please remember, do not use any of these grills inside of your RV due to flames and the poisonous gases these grills can give off. They are for outside use only!
  3. Cook With FireWho doesn’t love a good cookout? Many RV parks offer fire pits and grills for guests, so you may not even need to bring your own. This is also a perfect opportunity to grill a bunch of foods at once so you have leftovers for the next couple of days. With this option, you also need to make sure you are not around your RV while grilling to avoid a serious fire or any kind of explosion.
  4. Home Kitchen AppliancesYou don’t need to say goodbye to your favorite appliances just because you’re away from home. You can bring along your toaster oven, microwave, pressure cooker, blender, etc. as long as they are all safe for RV usage. If you are unsure if your appliance is safe to use, call the manufacturer to get more information.
  5. Prepare No-Cook MealsIf you have no stove, no grill, or you’re just not in the mood to cook – go cold! There are plenty of recipes you can prepare without heat such as salads, sandwiches, wraps, pastas, and, of course, any kind of fruit.

Before you begin cooking food of any kind in your RV, you should have basic fire safety materials available at all times. Putting together an easy-to-access fire safety kit and having a fire extinguisher on hand will make all the difference during your cooking ventures. Visit the Learning Center for more information on RV fire safety. Have fun and happy cooking!


More great posts by Shield Insurance Agency

Read More
Questions to Ask an RV Insurance Agent

Questions to Ask an RV Insurance Agent

Foremost Insurance Blog | by Noelle Kimble | RV Insurance

Road trip season is finally here and before you start packing for your next trip, it’s important to make sure you have the RV insurance coverage you’re looking for.

We spoke with a Senior Product Manager at Foremost Insurance to learn all about RV insurance and what types of things you should consider while shopping around. Overall, it’s a good idea to consider specialized coverage for your RV, since it functions as both a motorized vehicle and a home. Having coverage for both scenarios typically doesn’t come from just an auto or home policy.

Here are six frequently asked RV insurance questions you can ask your agent or broker when you are deciding what type of policy to purchase for your RV!

  1. Is my optional equipment covered?”Awnings, air conditioners, satellite dishes, LP tanks, and bike racks can all be damaged, so ask if these things are covered by your policy. Be sure to discuss whether the coverage applies only to originally affixed equipment or if it includes equipment that you attach after purchasing your RV. A good policy will give you a set amount of coverage included with your comprehensive coverage, with the ability to purchase more.”
  2. Is my personal property inside the motor home or travel trailer covered?”Chances are you are packing your camping, cooking, and other traveling equipment for your trip, including golf clubs or other things for entertainment. You can typically choose coverage for these items as part of a package. The one thing to double-check about personal property is sometimes your homeowner’s policy can have exceptions regarding coverage for personal property in a motorized vehicle. Your agent can help you figure out your best option.” To learn how to create a Personal Property Inventory read these helpful tips.
  3. What type of coverage is best for me—Replacement Cost or Actual Cash Value?”Replacement cost coverage protects your motor home from the effects of depreciation and usually isn’t available with an auto policy. With a Replacement Cost policy, if your new-model motor home is destroyed within a certain period of time after purchase, the insurance company will replace it with a brand new one of similar kind and quality. If your motor home is destroyed and you only have an Actual Cash Value policy, which is typically what you’d get with an auto policy, you will only be paid the current value of your motor home.”
  4. How much does RV insurance cost and what payment plans are available?”Whether you want to pay in full or in installments, having the flexibility to choose is an important option. Talk to your agent or broker. Insurance companies offer many different plans such as one-pay, four-pay, or twelve-pay options.”
  5. Is towing or roadside assistance available?”Towing and roadside assistance is a great coverage to have if your motor home or travel trailer breaks down and can include towing, jump starts, roadside service, flat tire changes, fuel delivery, and locksmith services. Specialized coverage is important and can exceed what you would get from an auto policy. You’ll want to be covered 24/7 by experts who have the equipment and parts to help with a bigger vehicle like an RV. Ask if coverage extends to any vehicles you may be towing behind you.”
  6. What about special coverages for full-timers or vacationers?”Some insurance companies offer these special coverages, which may cover full-timers when they are parked and using their RV as a residence. You can also ask about vacation liability, which may cover you in case you are found responsible for someone else’s injury in your RV while it’s parked. Again, exclusions in your homeowner’s policy may play into what type of coverage you want to purchase for your RV, so take this into consideration when you discuss your options.”

More blogs from Shield Insurance Agency

Read More